Got in a fight with the toaster.
Won.
Casualties: fingertips.
Got in a fight with the waffle iron.
Lost.
Casualties: waffles.
Got in a fight with the desk.
Won.
Casualties: desk.
Got in a fight with the toaster.
Won.
Casualties: fingertips.
Got in a fight with the waffle iron.
Lost.
Casualties: waffles.
Got in a fight with the desk.
Won.
Casualties: desk.
I’m getting tired of all the photos and stories – I need a break!! Here are a couple thoughts on things I (finally) had a chance to check out recently in Sephora with a friend. Whoo, mini-reviews…
ETA: Urban Decay’s new Pocket Rocket blinged-out-in-men glosses (here) are freaking huge. There’s less in there than there is in a NARS gloss, so why do that have to be so chunky? Hear that, UD? You get no love from me today.
ETA2: Photos, courtesy of Sephora.com. As usual, I love you, please don’t sue me!
…I get home today.
Weather or not I’ll have time to post? We’ll see. But I’m home! I’m home and I get to read any comments that I’ve missed, check any emails that I haven’t seen. I’m home!
[post written late June, in case nothing made sense]
EDIT: Confirmation :) I’ve made it back safe and sound – I missed you guys and theNotice so much! I have a ton of new stuff to try out and talk about… I’m so excited!
On trial today are MAC Blacktrack (fluidline), Smashbox Caviar (cream eye liner), and HiP Black (cream eyeliner).Let’s start with the packaging: MAC has the most detailed bottom label, Smashbox’s is fairly minimalistic, and HiP… well, it’s jar lacks a bottom label entirely, because it’s all on the top! I’m not sure which one I prefer, but I suppose if I had a bunch of the same liner in different shades, the HiP one would be the handiest, as you’d be able to see the colour if it was stored upside-down.
That said, though, you could always use your eyes and read the labels. Just sayin’.
In terms of how luxe the packaging is, I prefer Blacktrack, with its solid, study feel. The threads of the lid never stick, it’s easy to spin the lid on and off, and it has that gorgeous solid-glass weighting. Even the lid feels expensive! HiP comes in second, and Smashbox last – what can I say, I like glass jars! However, for the girl on the go, the Smashbox is substantially lighter, so keep that in mind.
As for standard application, the HiP liner is the “blackest” black. People look at me like I’m nuts when I complain that something black isn’t black enough for me, but hopefully my fellow makeup junkies will understand! Caviar is practically brown in comparsion! The HiP liner has a kohl-like, almost liquid-like finish, the fluidline a matte one, and the Smashbox liner seems to have a… sheen?
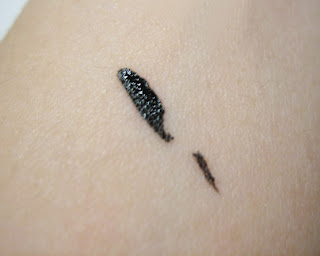
L’Oreal’s HiP liner also wins when it comes to creaminess, as I’m sure you can see with the swatch! I used the same brush for all three, and while I tried to pick up the same amount of each, it was definitely hard to do. The “super creamy” Blacktrack seems like a rock beside it.
When it comes to wear, I thought the best trial would be water smudging, so here goes nothing! *spritzes like a madwoman*
With two sturdy rubs of a tissue (can a rub even be sturdy!?) they look like this:
As you can see, the Smashbox liner is practically gone – shame on you, Smashbox! The HiP liner had the most colour retention, but if you compare the photos and swatches closely, I think you’ll find that Blacktrack was actually the one that smudged the least.
Lastly, in USD, MAC Blacktrack comes in at $15/0.1oz, Smashbox Caviar at $22/0.06oz, and HiP at $12/0.16oz. This means that, per 0.1oz, Smashbox’s is the most expensive – at about $37! That’s followed by MAC’s at $15 and HiP’s at $7.50.The verdict, at last? If you’re buying black, HiP is the way to go! I’ve been raving about this like a madwoman. This stuff is the bomb. (That’s right… I’m from the ’90s, ahd how are you?) It’s the most creamy, the most black, and the most cost-effective! Now get thee to a drugstore, because you can finally find them – even in Canada!
Lancome Artliner in Noir.
Pros: No smell, easy application (clean up a messy line with just water and a q-tip!) Delivers a bold line and doesn’t “bleed” during the day – I can wear this on my upper lash line to really fill in those lashes, or winged, or smudged under my lower lashes to make them a little more visible. It doesn’t trickle into lines, no matter how dry or oily my face is, and it doesn’t leave strange shadows as it wears off! (Well, that last bit is mainly due to the fact that it doesn’t wear off during the day ^^) Trust me, this one will last you from six in the morning to ten at night. It has amazing wear!
(note: this can also make a gorgeous mascara if you’ve forgotten yours! Just push lightly on your lash tips as it dries, bending them, so that when it does set, it retains a curl. Makes them look long and glamorous, as you all know! It lasts all day here, too, with easy removal at night and no flaking.)Cons: Unfortunately, this comes packaged with a hefty $28 price tag. So, this might not be the best choice for a girl on a budget – but if you love your makeup and your wallet isn’t hurting, this could be for you! The other deterrent is the removal: unless you take this off before you cleanse, little flakes end up in your eyes. They don’t hurt, but that’s gross, and probably not very good for your eyes! So, remove before cleansing, please, ladies!
The Verdict? Well, this would be a great choice — if you can afford it. But if not, I’m positive that there are drugstore liners that wear just as well. I know that, personally, I’ll love the hell outta this tube but probably not rebuy, simply because as a student I can’t justify spending this much on an eyeliner when a $5 drugstore long-wearing liquid is probably 90% as good!
I will never understand brown-toned lip colours. Pink, peach, red — all those, I can come to terms with. But brown?! How nineties is that???!
Anyhow.Here’s some more Aura Science! Here are two line lip pencils (god, I love AS’ simple names!) in “Walnut Brown” and “Sugar Plum”, these simply-packaged pencils are incredibly creamy, and very pigmented!
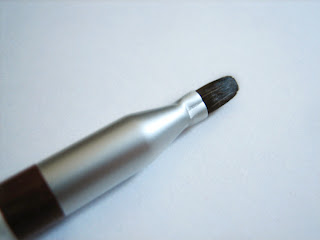
Let’s start with the packaging: they’re a little on the long side and therefore a touch awkward, but it’s worth it. Why, you ask? (Shh, let me finish explaining before you ask questions!) The length allows for a lip brush on the opposite end, which though cumbersome in low-end pencils is absolutely freaking brilliant! in this situation. Because Aura Science isn’t skimping out here on the packaging, the lip brushes are soft but still dense and firm enough to apply colour gorgeously, weather it’s to blend out your liner or apply the perfect lipstick on top of it.As for the shades? Clearly, I won’t get much use out of Walnut Brown, but Sugar Plum is just the most incredibly versitile berry plum, wearable on both my medium-toned warm mother and my very fair, cool toned skin!I wish they still made these :(
Calenders. They tell us the date and make things pretty, but what are they at the end of the year? Garbage.
Or are they?
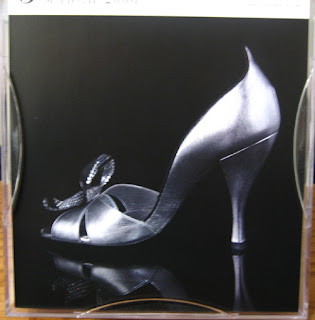
Here’s what I’ve always liked to do: Pick out a nice calender in early January (I can easily go a week without a calender if it means saving $20!!) Use it for the year. Once you’re done, cut your favourite images from the calender, and put them on your walls (or frame them first). Instant (and multitasking!!) art! I’ve got photos from a black-and-white pig calender (above) as well as my current calender – a day-by-day shoe calender. This one retails for $20-something, but I think we only paid about $7 for it.
The nice thing about day-by-days is they give you 365 different images to use, and all you have to do is make one cut across the top. One cut, and suddenly they look like perfect square prints!
Remember… buy calenders in January, when most stores have them marked down 75%!
MAC Dubonnet, layered with Smashbox Midnight Black eyeshadow and Vaseline.
I felt like doing a dark, vampy look after doing lip swatches for yesterday’s Dubonnet review (posted last Monday), so… this happened! After applying Dubonnet, I just mixed a bit of Vaseline (let it sit on the back of your hand for a minute or two to become more of an oil) with black shadow (pile it onto your brush, then use that brush to mix up the Vaseline on the back of your hand – don’t worry, the colour will get there). Then, just apply carefully, and try not to lick your lips!