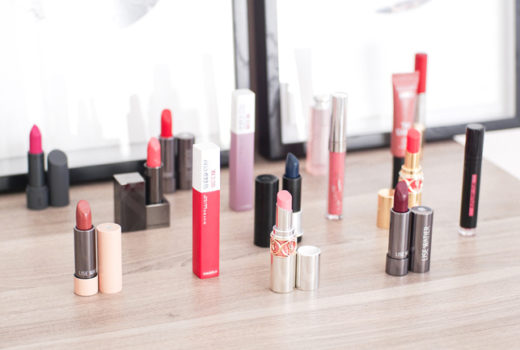
Free Laura Mercier Mini Lip Colour Shimmer at Sephora online. NOT valid in Canada or with purchases on gift cards.
- The Italian Job
- Transformers (I know, I know… I’m a terrible person.)
- The Prestige
- The Dark Knight
- …may update this later, because now I’m out of computer time!! Sorry posting has been so irregular, lovelies, but I’ve been just swamped. Continue checking daily, though, because I promise it’ll get better within a day or two!
- (pointed) Foundation brush (I’m not sure if these are the same brush, but they look the same!)
- Eyeshadow brush (this link is a pretty good match, by the image…)
- Angled eyeliner brush (no link for this one – can’t find anything like it full-size!)
- Brow brush (same here)
- Kabuki brush (link to their small kabuki, which is larger than this one, I believe)
- Powder brush (again, not a link to this brush, but the similar ones)

- Foundation: amazing. I used it to put on a sample of some Smashbox liquid foundation, and the foundation was gross… but the brush was great. It’s the most luxurious brush I own, and I would definitely recommend it! Though the full-sized is $32, I can tell that it will last next to forever, and it’s well worth it. The “pointed”-ness means you can get into the little corners by your eyes and nose, and the synthetic that this is made of (most foundation and concealer brushes fair better in synthetics, as they have no cuticle and will therefore not absorb your product) is bang-on.
- Powder: I love this for blending out my cheek colour and swirling on powder, of course! This fluffy brush is great at what it’s supposed to be great at, but I don’t know if it’s $35 great.
- Kabuki: Tiny, and great because it doesn’t engulf my entire freaking face. Very dense and very soft! I adore this brush.
- Eye, and angled eye liner brush: these don’t get used often, but when they do, it’s to apply eyeshadow (the liner brush? Way too big for liner.) They’re not as impressive as the first three, but they’re still pretty nice brushes. With full sizes around $20-25, the pricing is decent, too.
- Brow: no idea! I don’t do my brows :P
- Quo brushes are hit-and-miss, but they go on 20% sales almost every week and 40% sales every now and then.
- The Quo All Over Eye brush is a definite hit!
- Adesign mini brush sets are great for a mid-budget gal. They’re not super super expensive, and you are getting great, high-quality brushes for your money. However, there are a ton of great budget options out there as well!
- Art brushes are great alternatives, and the synthetic kids’ sets are fabulous for putting eyeliners on sensitive rims!
- Body Shop brushes are worth checking out, and are definitely great quality. Not to mention, they’re to-die-for soft!
- Candle
- (matches, to light it)
- Metal spoon
- Something to melt (I’m melting my CoverGirl concealer in Neutralizer… yes, I am so fair that I use a colour correcter to match my skin tone, lol!!)
- Something to hold it in (In this case, a Costal Scents 5g jar. Best price I could find, black lids just like I wanted, and shipping to Canada doesn’t cost an arm and two organs!!)
- An old magazine or newspaper, just in case you make a mess!
I have another title to add to the list of films I could watch a billion times and still love. SJP was amazing, as was Ellen Paige, and unlike many reviewers, I loved the lead.
Smart People hit too close to home for comfort, but is an amazing film that I could honestly watch monthly.
The rest of the list?
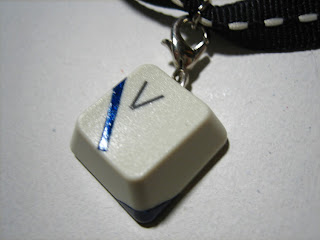
Melanie, the Asian-beauty-loving sweetheart behind Best Face Forward, finally received her key items!! I sent her an 8 bracelet, a keychain (the initials are for her bf’s dogs’ names) and two magnets as extras (the other 8 on the keyboard, plus a “home” key) I forgot to take pictures of the magnets, though x.x
 Also, I sent a choker for swap. I put on a little lobster claw, so it comes off like a charm!! :P
Estee Lauder Blush All Day in Plum This lovely colour isn’t actually very plum – I see it as more of a medium-toned dusty pink. It looks wonderful dusted lightly on the apples of my cheeks, but can be layered into the contour to shape and sculpt as it colours. It works wonderfully with my fair Asian skintone, and yet I can see this blush working on anyone with skin ranging from very fair to medium-toned! It’s got a bit of sparkle, but only a tiny bit, and the glitter is tiny – not a disco-ball effect, but a glowing one.
I received this in a swap on MUA, so mine is GWP size. This should last fairly long, though – it’s become my almost-daily blusher, but I’ve barely put a dent in it. The colour payoff is just below average, which is actually nice – that means it can be applied very lightly with ease, and builds up well. Despite this, though, the blusher is very ‘solid’ – there is no crumbling or dust flying when I swipe it, so your don’t loose any product.
This is more expensive than I’d generally put out for a beauty product – $24.50 in the US, and probably therefore $30 in Canada – but if I can’t find this online for cheaper when I run out, I would actually rebuy at this price. Yes, folks… it is that good.
Product photo and swatch here.
This is for all of you, but especially Phyl – because fingers in potted products are icky. It’s just a quick skimming of a bunch of my brushes, in the order that I bought them. I hope you find it helpful!! (There’s a super-quick summary at the bottom for those of you that want the dish without the time!)
First up is a Mini Brush Kit from the Body Shop. I don’t have my own photo of them in the little case, but I do have a couple of images. (The back, which peeks out on the left in this image, folds to cover the brushes; velcro closing. There’s a tiny mirror in the top, but it’s fairly useless) My biggest pet peeve is that if I close this case, my blusher brush gets bent. My favourite part of this set is the fact that they’re high-quality synthetics. Super-soft (but not TOO soft) and cruelty-free, they’re great quality and will last forever. This set is $18.50 and contains four mini brushes.
I used the eyeshadow brush for concealer for the longest time (I’m using it for my RareMinerals Blemish Therapy sample right now), and it works great for liquids, creams, and minerals.
The blusher brush is a little on the small side, but it’s alright – super soft, and I actually use it to smooth on mineral foundation when I need a little light coverage but my kabuki’s out of commission, or my face is being super-sensitive. I have to get around to checking out the full-size sometime – I’m hoping it’ll be larger, which would make it perfect!
The last two are the slanted brush and the lip brush; neither get much use but both are great. I can use the slanted one for a thick line, if I wanted to, or to sneak a shimmery eyeshadow or concealer into the inner corners of my eyes. The lip brush is fab for getting just the right amount of lipstick on, and keeping it in line, and it comes with a little lid. I bring it along with my little potted concealer in case I need a midday touchup; it’s listed as a lipstick/concealer brush on the site (but not on the brush itself – I guess they ran out of room!)
Art brushes – they were purchased before, but I started using them right after I bought my Body Shop brushes. They’re not Loewe-Cornell MAC dupes, but rather the synthetic kids’ sets. (Update with photos in a while if you want them) I have really sensitive eyes, and I used to tightline with a pressed powder eyeshadow, used wet. These are perfect for a soft eyeliner look – cheap, thin, and very soft!! However, note that they do not usually offer enough control for something like a wing. They’re also pretty good at applying cream concealer – I always use the slanted one to cover up blemishes, getting product just on the tip!
Update: here’s a photo!!
I did a review on my Quo brushes back when I bought them, but here’s your overview: Face Contour brush: love the fact that it’s white (you always know how much product you have!) but it’s too big and fluffy for me. Once washed, it smells kinda funky and really puffs out… not recommended, unless you have an unnaturally large face? :P
 Now, the All Over Eyeshadow brush, I do like. Very much. I use it to put on mineral concealer in my undereye area, and it does a great job of it. Great, even coverage, and it’s super-soft, but still fairly stiff. When I do wear a touch of eyeshadow, this is great, though it’s a bit large for my Asian monolid crease!! A must-buy for a beginner with double lids, and a buy-on-sale (like I did! 40% off!!) for the rest of us.
 Lastly is my Adesign mini set ($45) which I received courtesy of the darling FB. It contains…
Though I would never spend $45 on a brush set, I must admit that it is pretty good. When washed, they always dry and have great shape, unlike my Quo contour brush! And the roll us cute (not to mention handy for on-the-go gals!) It is a little large for my liking, though, and I keep all my brushes in my drawer – so this is stored away unless I’m travelling. If you’d like specifics, here they are:
The one disappointing thing about this set is that there’s no blusher brush, which is a definite no-no for a blush whore like me!!
And a summary of this post, for those of you that only want a five-second breakdown…
Whoa! Long post. *breathes*
Ton of stuff to do still, so I’ll chat with you later, ladies!!
Via People, via The Insider. My comments italicized.
• She’s frugal. “Sarah gave me a thank-you card after I helped her with her lieutenant-governor race,” said her friend, Kristen Cole, who has known the Alaska governor since childhood. “She liked the card so much that she didn’t sign it so I could give it to someone else.”
Read: she considers herself to be too buys for you, so she didn’t sign your card. Her secretary purchased the damn thing.
• She’s a techie. Palin prefers texting to phone calls.
Read: cannot answer questions under pressure. Has quick thumbs.
• She’s a rock fan. She named her son Trig Paxton Van Palin because it sounds like the band Van Halen. Says friend Judy Patrick, a former city council member who has known Palin for 12 years, “How cool was that to have a kid named Van Palin?”
Read: tries very hard, and yet, is still very lame
• She’s adaptable. Palin used to wear Mary Kay lipstick, but she now prefers MAC.
Read: Palin now considers herself too good for Mary Kay, and is “hip”. But I mean, seriously. You change your shade of lipstick and it means you’re adaptable? Well then, the beauty community consists of freaking chameleons!!
• She’s a traditionalist. Palin is against waxing. Cole recalls: “I remember that one of her girls wanted to get her legs waxed, and Sarah said, ‘Are you kidding me? What’s wrong with a razor?’ “
Read: She’s afraid of something new, unless it benefits her. Seriously people… if she was a man, she would totally be the type of wax-hating gun-bearing up-in-arms man that would hate the idea of a female running mate. Just because she’s female.
Normally, I write up something huge and put in in backlog. Today, though? Nope!! I finished this on the weekend and I was just so excited about it that I had to show it to you guys STAT!!
So anyhow… here’s the preface: I had an old stick of concealer in tube form that was getting kind of ugly. So… I melted it and put it into an empty 5-gram jar. Why is this tut so exciting, then? You guys seemed so excited about the last one that I got excited too – and drew on the pictures!! Let me know if you love it or hate it. It takes a while, but if you guys like it, I’ll get the hang of it eventually!
This tutorial works on the same general concept as the last one, but is, as you will see, is infinitely cooler.
Tutorial: Making a pot concealer (or lipstick, chapstick, etc)
Step one: Shave some product off the stick if you only want to do a partial melt, or pop out the whole thing and centre it on the spoon. 
Step two: Melt. Keep the spoon a few inches above the candle – the heat will be enough, so don’t touch your spoon to the flame!! I move the spoon as it melts, to swirl the product around a little and help it melt evenly. If you’re working with a smaller amount, though, you don’t need to worry about this. Step three: Pour the melted product from the spoon to the container. I wiped the excess from the spoon into the container, using my finger as a spatula (ick!) Use a real mini spatula if you’d like, or just skip that part altogether. DO use a tissue to wipe the excess off before washing, though, and use makeup remover to wash the spoon first, if dish soap isn’t doing the trick!
 Step three-point-five: If you only did a partial melt, take your original stick of concealer/lipstick/etc and rotate it briskly over the flame, at least two inches away from it. This will give you a nice shiny finish – but remember, too close and you’ll just melt the product away!
 Step four: See? Only four steps, and you’re done! This took a whole ten minutes to do, and I’m loving the new form – I always use a brush anyways, and the tube was such a hassle (not to mention, I broke the lid)
 Remelt with a blow-dryer as often as you wish to get an even finish again. I use this concealer much more often, now – it just seems so much more accessible! I got my pot concealer that I wanted, without all the hassle of finding a new pot concealer in my shade :)

