Follow:

    The Fashion Week FOTDs: super-nude to glossy and dark

    There are two extremes that you see a lot of in Fashion Week photos, no matter where you are: the super-nude face, and the red lip. I decided to do a “transitory” look, starting with a nude face (light nude eyes, colourless skin, and paled-out lips) and take it into a look with dark, glossy eyes and red lips. Think… NYFW Vera Wang to Marc Jacobs.

    ————– time ————>

    I love doing broken-down looks that are slowly transformed, because it’s a great way to pick out which elements you do and don’t like, so that you can translate them into your everyday makeup. Hope you enjoy — I  had a lot of fun with this one!

    To see the looks, find out how to create them, and hear what I used, keep reading.
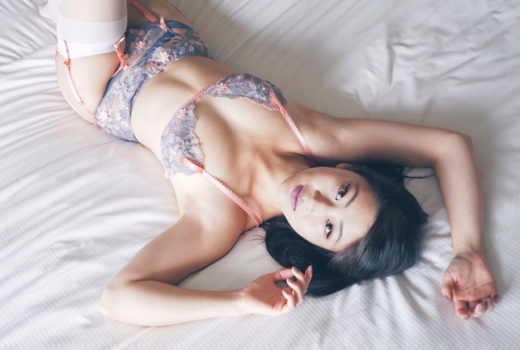
    The flat, nude look

    Of course, this was the easiest to execute! For the base, I simply applied a medium-coverage tinted moisturizer and lots of concealer (well, and Photoshop, but we don’t have access to that in real life…) The lip’s included in this step, too — just go over them with foundation or concealer as you do the rest of your face. Prep the skin with a luminous primer, or opt for something with a satin or dewy finish.

    The cheeks and eyes are just as simple; contour (heavily) with a matte product for the former. For the latter, I simply went over my entire area with a skin-toned shade, added a bit of contour with a shadow just one shade darker, and topped with mascara. (Both shadows I used were matte as well.)

    (My apologies for the awful photo. I’m blaming the lighting!)

    Getting darker…

    For this, the cheeks and lips stay the same — the only addition is the eyes. I layered on only one shade (black, obviously!) and just spent a bit of time buffing and blending. Then, line your upper and lower waterlines and lash lines, smudge any hard edges from the liner, and check for fallout!

    If you do find fallout, leave it there. (Kidding. Clean it away and touch up your base as necessary.)

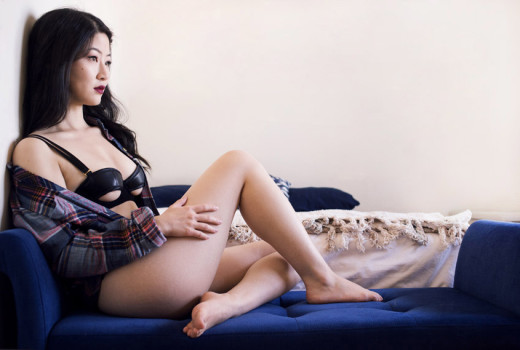
    And darker still…

    The eye stays the same as in the above version, but I amped up the cheeks and (obviously,) the lips! I like a really matte, crushed-berries red lip, so I chose to go with a liner overtop a hydrating lip balm — but choose as you wish! Remember to blot the finished product, and don’t be afraid to perfect your lip line with a q-tip soaked in oil-free makeup remover and/or concealer.

    The cheeks are a little bit harder, but shouldn’t cause you too much trouble. For a really contoured look, I picked a burnt red and buffed it onto the apples of my cheeks, blending upwards. Then, for the contouring itself, I chose a dark matte plum and worked it lightly onto the bottom of my cheekbone. Tip: keep a clean brush on hand for extra buffing and blending!

    The glossy eye 

    I wanted to try this out; I know it’s totally unwearable but was nonetheless fun to do! For this, I simply swatched my black shadow (heavily) on the back of my hand, picked up a bit of Vaseline on the ring finger of my other hand, and blended. Then I just patted and smudged it onto my lids, simple as that!

    (Erm, also… I have no idea what the heck my hair is doing, but aside from looking really weird, it’s also making my cheekbones look like WHOA! so I guess I’m okay with it?)

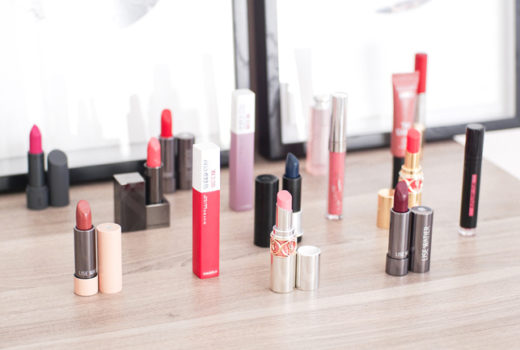
    Products used — light

    Senna Eye Shadow in Fusion
    MAC Eye Shadow in Blanc Type
    100% Pure Ultra Lengthening Mascara in Black Tea
    MAC Powder Blush in Harmony
    100% Pure Tinted Moisturizer in Creme
    Marcelle Face Powder in Translucent

    Products added — dark

    NYX Eye Shadow in Black
    Urban Decay 24/7 Eyeliner in Zero
    Paula Dorf Lip Liner in Tapestry over Bobbi Brown Lip Balm SPF 15
    Senna Eye Shadow in Intrigue and Smoulder to contour and colour cheeks (not pictured)

    Suggested dupes…

    For the dark cheeks: MUFE Powder Blush would be fantastic, with their colour selection — I’d go with something like Dark Red and Pearly Rosewood, I think. Or, use a matte shadow followed by a pearl-finish one (which I did.) MAC Beauty Marked would be perfect for the contour shade!
    For the lip colour: Dark lips are really personal, but I love products like Annabelle Adrenaline for a lipstick, or theBalm Boyz’n My Berry for an easier-to-wear gloss.
    For that “perfect base” foundation: MUFE Face and Body, of course! Or, try whatever you’re currently using and mist it gently with a setting spray (water and glycerine in a 5:1 ratio works nicely.)

    Share:

    The new girl in town

    Marcelle’s new blog is up and running — congratulations to those at Marcelle! More to say tomorrow if I have time (quite busy this weekend; my apologies!) but I did want to get this link up ASAP. As you must all know by now, I am absolutely in love with Marcelle, from the skincare, to the makeup, to just the general aesthetic of the line, so on a scale of one to exciting… this is definitely getting close to a ten.

    On a personal note: the blog is the brain-baby of Isabel, our contact at Groupe Marcelle and one of the funniest, most genuine women I have met through blogging. I’m not the type to make friends ever quickly (I’ve been told that my humour is too “off-kilter and aggressive,” to name a few complaints…) so I was surprised to make a friend through a string of occasional emails — but I did, and she’s pretty darn great, to be honest. 

    So, please do check it out and say hi to her in the comments! It’s not just a makeup blog, but rather it is a lifestyle blog for the Marcelle woman, and I think she is exactly that — strong, gorgeous from the inside out, and just overall fabulous.
    See the brand-new blog here!
    Share:

    Because I won’t post these images otherwise…

    Revlon “Mystic” artificial nails, which I was sent probably abut a year ago, now. I never wear anything on my hands, so I won’t be able to review them, but I thought I may as well share the images. After all, they are quite cute!

    These are medium-length nails that are 24 nails/pack and they do come with adhesive, a file, and a short, plastic version of am orangewood stick. 
    Share:

    It’s BCA month, and you know what that means…

    BCA products! Honestly, I think it’s great to purchase products for a cause — many of them are items in the strain of what we’d need to pick up anyways, so we may as well use our purchasing power to go towards something that could make a difference. Of course, donations are also an option, and a direct donation will should go right to the cause. I haven’t researched charities, so I’m not going to recommend one, but I would definitely encourage you to do so if you’re interested.

    Don’t forget to read the product info and find out how much each company is donating! They can donate a penny per product and still label it as a BCA product, or they could donate everything. And trust me, there is quite a range.

    Some of the beauty items featured this year… (click on the images to check out the products!)
    Sephora has five products coming out, and will donate a dollar per product sold. Items run $8-$60.

    Sonia Kashuk put together an entire makeup collection (which has actually been out since Aug 22!) Products run $6-$22, and 15% of the the purchase price will be donated per product.

    Sonia Kashuk, Sonia Kashuk

    Clinique will be donating $10 per limited-edition bottle of their cult-fave Dramatically Different Lotion sold, and $4 per Lip Trio Key Ring.
    Estee Lauder, as usual, has a few gorgeous LE lip collections and a chic pin. They’ll be donating $500 000 (which is very substantial, as far as BCA donations go,) no matter how many products they sell.

    Estee Lauder, Estee Lauder, Estee Lauder, Estee Lauder

    Oh, and if you’d rather pick up a single lipstick than a set, they do have their Elizabeth Pink Pure Color Lipstick!


    Origins will be releasing a breast cancer awareness edition of their Peace Of Mind, which will be just $10.

    Smashbox is donating all proceeds from their Barely There Pink gloss to the fund, which is pretty impressive. The shade is great, too — I’ve noticed companies have been pretty good about making their BCA shades fairly neutral, so we don’t have to choose between the cause and a cute shade.


    Bobbi Brown’s gorgeous Pink Shimmer Brick is coming out again, of course!

    Some more participating products and companies… (click on the images to get to the products, and remember — not all shades or sizes are always included, so read their pages carefully!)

    Shiseido, Jo Malone, Shiseido, DKNY


    Ojon, Michael Kors, clarisonic, Conair


    Share:

    Annabelle SkinTrue: keeping a bronze through the winter months

    What it is: Annabelle’s SkinTrue Duo Bronzing Pressed Powder

    The basics: before finding Annabelle’s Zebra bronzer, this was definitely the best solution I had found out of the drugstore. It leans more red than it does orange, resulting in a much more natural glow than most drugstore options. The two sides give you the choice of a shimmery bronzer, a matte one, or a mix of the two. I tend to choose something with a bit of shimmer for a tanned application (ie on the high points of your face,) but go with something matte for a contouring application, so I guess this was made just for people like me: that’s exactly why they made it a duo!


    matte / blended / shimmer
    (Please note that the above have been swatched fairly lightly, and that the product does get even stronger in terms of pigmentation, if desired! The following photo is horrid for colour balance, but shows off the depth of pigment a touch better.)

    Good to know: like many Annabelle products, this is unexpectedly pigmented, especially for a drugstore product. Which is great, at least if you ask me, because that means that a) a little goes a long way, and b) it will suit a broader range of skintones! For darker-skinned ladies, just opt for a bronzer or blush brush, and for lighter-skinned gals, try a fan or powder brush for a lighter application.

    Depending on your skintone, some ladies may find it too orange — but honestly, you’d have to be applying quite a lot, and you’d need to be even cooler-toned than I. Most of you (like, in the 98% range) would likely find the shade just fine in terms of orange-ness.

    The ingredients:

    Ascorbyl palmitate, Boron nitride, Dimethicone, Ethylhexyl palmitate, Imidazolidinyl urea, Lauroyl lysine, Methicone, Methylparaben, Mica, Polymethyl methacrylate, Propylparaben, Silica, Squalane, Talc, Tocopheryl acetate, Zinc stearate. May contain: Iron oxides, Titanium dioxide.

    Skintrue vs Zebra: I know you’ll ask, so I may as well tell you now! Out of the two, Zebra is my favourite — but they’re honestly so different they practically fall into different product categories. Clearly, this means only one thing: it’s table time. 
    The verdict? If you’re looking for a drugstore bronzer (or a bronzer at all, actually,) this is absolutely the one that I’d choose. Now, I don’t personally use it, but that’s because I just don’t care for the bronzed look on myself — crazy, I know, but that’s me! For this reason, Zebra is my favourite, but if you’re looking for something to boost (or just plain-out create) that summery glow, trust me: this is it.


    It’s cheap, it’s sleek, and it does its job well. So keep your eyes peeled for…

    …that box there.
    Share:

    Rimmel to the rescue: a Gentle Eye Make Up Remover review

    What it is: Rimmel Gentle Eye Make Up Remover

    The “Gentle Factor”: Well, okay. The thing about makeup removers is that, like many other things that have to do with our eyes, they’re a very personal product. What works for me may not work for you, and vice-versa.
    That said, I was pretty happy with the gentleness of Rimmel’s makeup remover! I found it to be just as easy on my eyes as — if not even slightly more easy than — The Body Shop’s Camomile remover (which, as I’ve mentioned, is often declared to be pretty much as gentle as it gets.) What does that mean, exactly? Well, it stings the skin around my eyes, but doesn’t irritate my eyes themselves any more than, say, water would. 
    The “Removal Factor”: Unfortunately, I’m docking points (theoretical points; we’re still resisting the trend to rate products with math-y formulas) for the marketing. From my experience, this does not remove waterproof products, despite Rimmel’s claims! However, for non-waterproof makeup, I’ve found it does a darn good job of removal. The trick (as with any remover, be it makeup or nail polish) is to let it work its magic for a few seconds: soak a cotton pad with remover, give it five seconds on your closed eye, then gently wipe it all away.

    The proof: There are a lot of reviews talking about how Rimmel’s makeup remover doesn’t really… remove. So, I wanted to share some photo-evidence with you! I soaked a bit of a tissue to take off Monday’s eye, wiped my eye area a few times (without using more remover or another cotton pad, etc.) In seconds, it went from this…

    …to this!

    And just to prove that it really did get everything, I took a clean tissue, rubbed baby oil all over my eye area, and swiped again:

    nada!
    The ingredients: (It’s silicone- and paraben-free — however, I’d rather it didn’t have SLS…)

    Water (aqua), Poloxamer 184, Sodium PCA, Disodium Cocoamphodiacetate, Propylene Glycol, Sodium Laureth Sulfate, Sodium Lauryl Sulfate, Tetrasodium EDTA, DMDM Hydrantoin, Panthenol

    The verdict? For around $6-8, I think this is a great buy — but it’s not something I’d kill attack a mother bear dash out of a meeting to go pick up. It’s non-greasy, scent free, and it does a great job of (gently!) removing makeup, but won’t work as well on waterproof or smudge-proof products.

    Try it if…

    • You want something to remove normal-wear products,
    • You go through a lot of makeup remover (the cost of remover really adds up, especially as a beauty blogger!)
    • You’re looking for something gentle, or
    • You want something that’s easy to find, with well-made packaging and a zero-grease finish.

    Availability: Well.ca, Ulta, Walgreens

    Share:

    The Marchesa for Le Metiér de Beauté collection is now online at Nordstrom.com!

    Well, some of it is, at least. I’m still on the hunt for the double-ended lip glosses, but will add them as soon as I can find them. Found ’em, nevermind!

    The collection contains:

    • Two small palettes by Georgina Chapman and Keren Craig, the former containing a translucent pressed powder, concealer, lip gloss (in La Cerise Noir,) creme blush (in La Peche,) and eyeshadow (in Le Minuit,) and the latter containing bronzer, concealer, lip gloss (in Le Caramel,) creme blush (in La Rougeur,) and an eyeshadow (in Le Fauve.)
    • Two Sheer Illumination Hilighters, in Hilighter or Brightener
    • Four Double Entendre Lipglosses, in La Figue/Le Rasi, L’Embrass/Le Pass, Le Feu/La Glass, and La Rouge/La Rue.

    Stock-image product swatches from the Nordstrom site:

    (Click on the images to get to the product pages.)

    This is pretty much our first peek at the collection (which we mentioned before,) so what do you think — still interested?

    Share:

    The Cup Reviews: instead Softcup

    For a bit of background information on menstrual cups, read this post.
    Oh, and also:
    TMI alert! TMI alert! Alert alert alert!

    What it is: instead Softcup disposable menstrual cups

    What we love

    • The Softcup is a lot less icky than other menstrual cups! There’s no washing/scrubbing/boiling involved, and removal is quick, painless, and relatively clean. It takes a bit of practice, but I can get it out with just a bit of blood ending up on my fingertips; no messier than a tampon.
    • It’s also a lot easier to get in (and out) than other cups — you pinch the two sides and insert it like a tampon. The pink plastic is very malleable, so they really do pinch right together. It’s no harder to get in than a regular tampon (and way easier than supers and extra supers!)
    • There are a bunch of “side benefits” that come along with using this kind of cup. For starters, there are no strings attached, literally! Nothing… hanging out of you. (Ahem.) And while I can’t vouch for it, they do say you can wear the Softcup during sex while you’re on your period for less, erm, mess.
    • The Softcup can be worn for up to 12 hours, unlike tampons (which run 4-8 if I’m not mistaken.) Of course, I have to change mine more often, but my lighter-flow friends (aka every single !@)#!@$ person I know; it’s just not fair!) should be fine.

    What we don’t

    • These cups are one-size-fits-all, and unfortunately… we’re not all the same size down there. I found it to be a touch too long for me; it slips too low every now and again and can be hard to get all the way in. So, make sure to sample them first! If they fit, you’ll know: when they’re in properly, you can’t feel the cup at all.

    Tips and tricks
    As I’ve mentioned, I find inserting the Softcup to be a breeze. It’s awkward the first time, but the process is just so easy to get the hang of. Anyone who can insert a tampon should be fine! (And to be honest, it’s easier to insert a Softcup than it is to insert an extra super tampon, or anything by OB…)

    However, I know not everyone is as utilitarian about their female reproductive system comfortable with their ladybits as I am. So I asked Tracey Croughwell (Evofem’s Marketing VP) if she had any tips of her own! She had a ton of incredibly helpful ones to share, so here are a few of them:


    • To insert the Softcup, sit on a toilet and relax. Compress the Softcup, then push it into the vagina. Push it back, not up. You should feel the Softcup go past your pubic bone, and when it’s in place it will be tucked up behind the pubic bone. Once it’s inserted correctly, you won’t feel it.

    • If you can feel the Softcup, it probably is not in place. Simply remove it and try again. To remove it, insert your finger into your vagina. When you bear down with your muscles (like you’re pushing out a baby), the rim will come down and be easier to hook your finger around. Hook your finger around and gently pull it out.

    • When removing the Softcup, remove it slowly and keep it horizontal (so it’s less messy).

    • Removing the Softcup will be messy at first. You’ll eventually get used to taking it out, and the whole insertion/removal process will become quicker, easier, and less messy… and it’s totally worth the freedom and comfort you experience with the Softcup!

    Psst — did you notice the “How-To” tab at the top of the Sofcup site? Definitely worth checking out if you’re not sure how to go about using your cup!

    Other things to note

    • The Softcup is just over $10 for 24, but the samples are available for $2.50.
    • Because they’re non-absorbant, the Softcup doesn’t cause irritation or dryness. I mean, don’t get me wrong; I love tampons just as much as the next gal (most days)… but there’s nothing worse than inserting a tampon when the last one wasn’t totally soaked!
    • For the same reason, menstrual cups aren’t associated with TSS. And on a health-related note, they’re also free of things like bleach (used to get your tampons that clean-looking white-white,) and latex.

    One last thing: we decided to do this review in point-form, just because there was so much information we wanted to share. (And we didn’t want to force you to read three and half hours of text!) If there’s anything we missed, though, don’t hesitate to ask questions in the comments :)

    P.S. Purple packaging? We approve!

    Share: