Follow:

    Karl Lagerfeld x Shu Uemura | Painting Liner in Blackish Satin Purple: review, photos, swatches

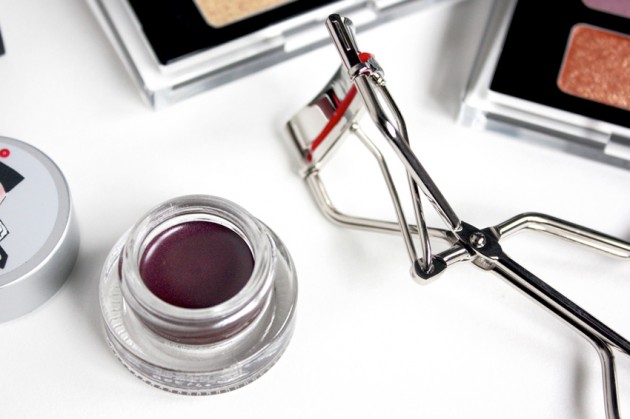
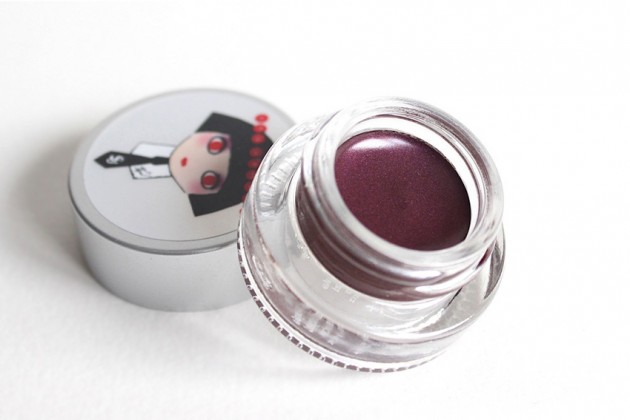
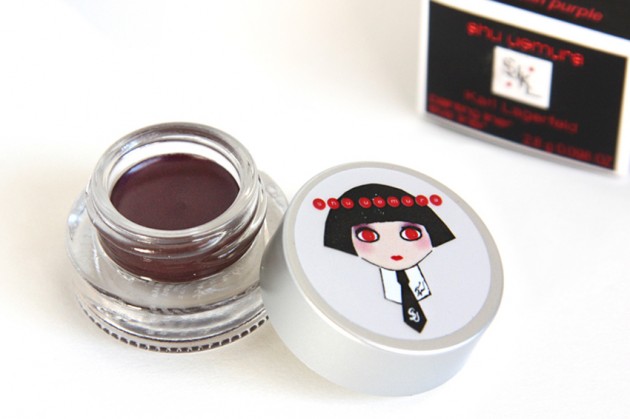
    The product: karl lagerfeld for shu uemura Painting Liner in Blackish Satin Purple

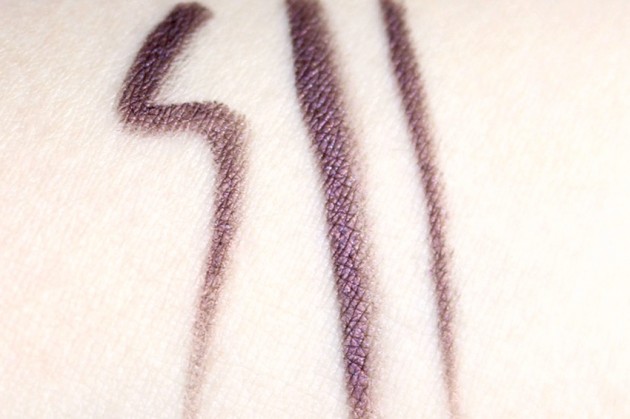
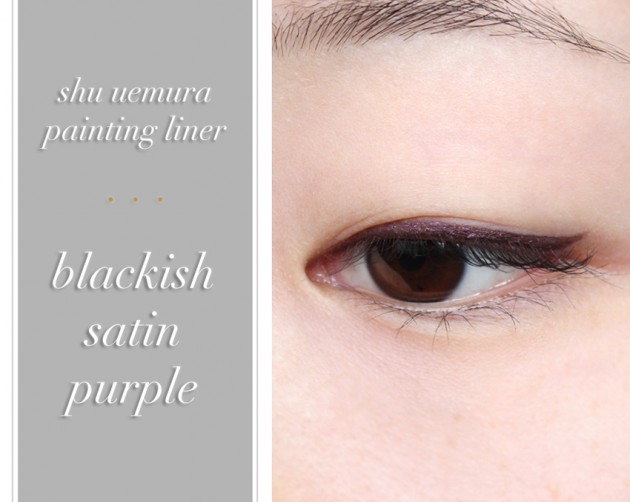
    The shade: As expected, Blackish Satin Purple is… a blackish satin purple. (Don’t you just love the Shu colour names?) It feels a little less “purple” than the rest of my purples; I’d be more apt to call it a mulberry, or a plum, even — it’s colourful without being all that vibrant, making the colour easy to wear during both day and night.

    I love a good, bright violet, but shades like this one are definitely easier to wear: soft and with finely-milled shimmer, the effect is like wearing a gorgeous grey or taupe, softer than black but still dense enough in colour to really create a fixation point in the eye area. This red-violet has enough blue in it to keep you from looking tired, and the faceted blue/red/gold shimmer certainly doesn’t hurt, either.

    The wear: I don’t get perfect wear out of this (I don’t get perfect wear out of anything), but it’s not half bad. The Painting Liner formula is gorgeous, smooth and almost fluffy, and it applies like a dream, sharp and pigmented.

    While I do get creasing after four or five hours (most liners make it two on me, tops; my lids are crazy), the formula is so good that it wears just as well without primer as it does with it — I tested this first with NARS Smudge Proof & silica powder, but it made no difference when I wore it on my bare lids. When it does start to move around, it fades pretty evenly, with no flaking or smudging.

    The verdict?

    I’m really not crazy about the Painting Liner price tag ($25 USD / $29 CAD for 2.9g/0.098oz), but I think gel liner fans are definitely going to want to check this one out. The shade is soft, versatile, and chic, and the lightweight-but-pigmented product doesn’t disappoint in wear or application.

    For a drugstore dupe (in Canada, at least), Blackish Satin Purple really reminded me of Marcelle’s Waterproof Eyeliner Pencil in Mulberry, a similarly wearable purple. (See a swatch at the end of this post.) It’s not as much of a wow! product as the Shu Uemura liner, but at a third of the price, it’s a really good alternative if you can’t fit the Shu in your budget.

    Additional photos & more »

    Share:

    Light up the holidays with this Sephora + Pantone Universe Luminous Brush Set: photos & review

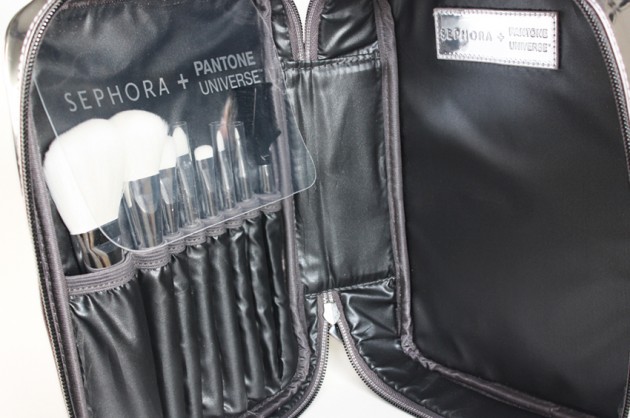
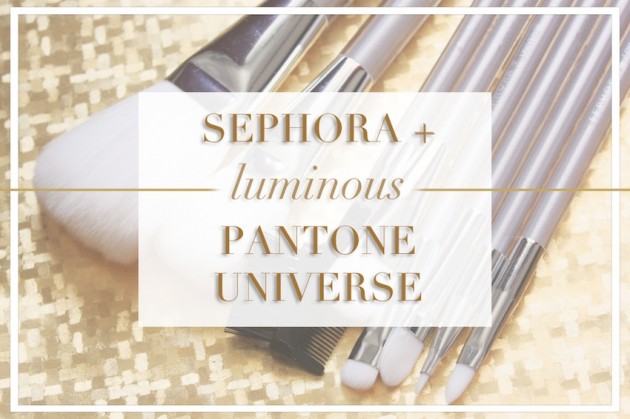
    The product: SEPHORA + PANTONE UNIVERSE Alchemy of Color Luminous Brush Set

    I’ve been planning a “daily beauty” column recently, and I thought I’d start it off with this Sephora + Pantone brush set — that is, right up until it got a stealthy half-price markdown. 

    While it’s good, it just didn’t feel like it was $80 worth of awesome, you know? But, at $41 CAD, these white-bristled synthetics are worth a second glance.

    Beauty & the Bag

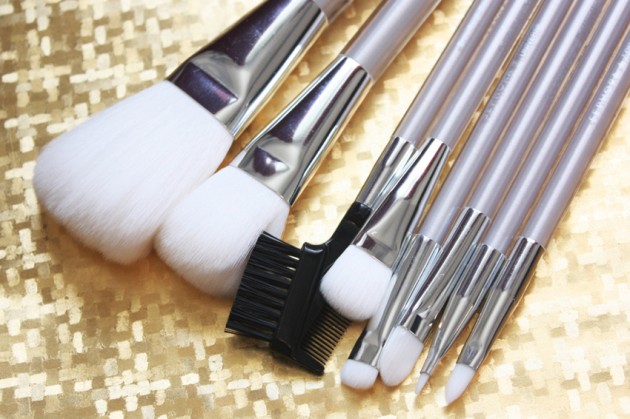
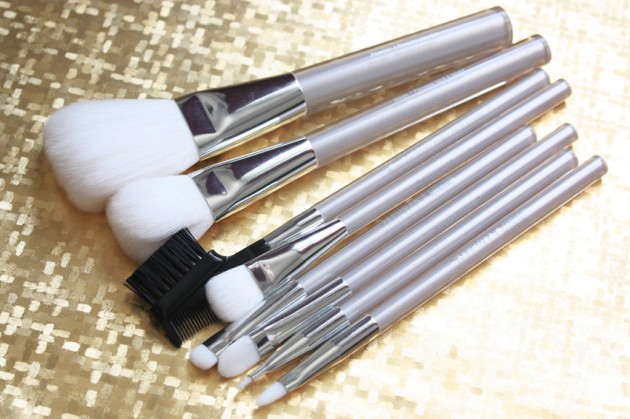
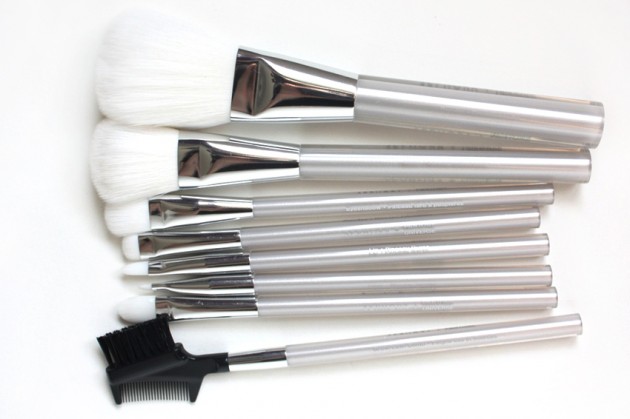
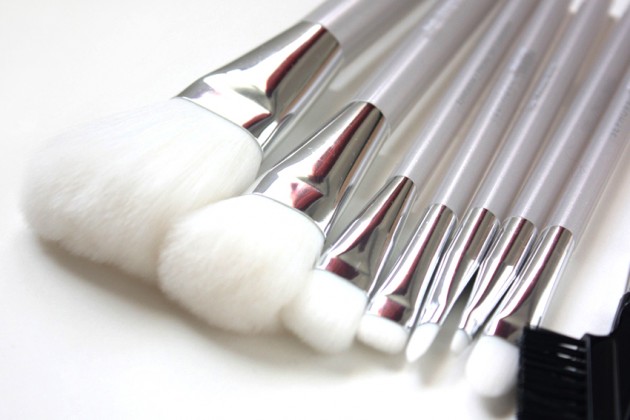
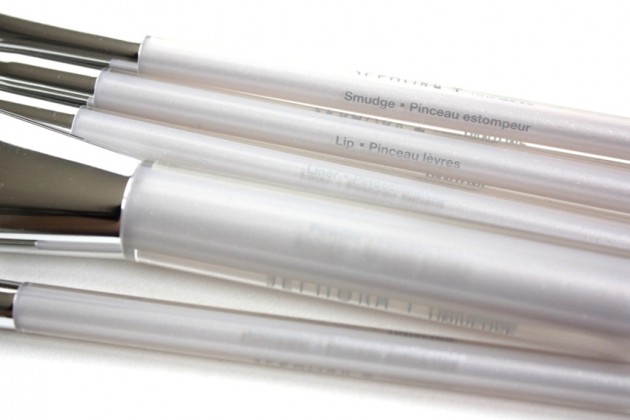
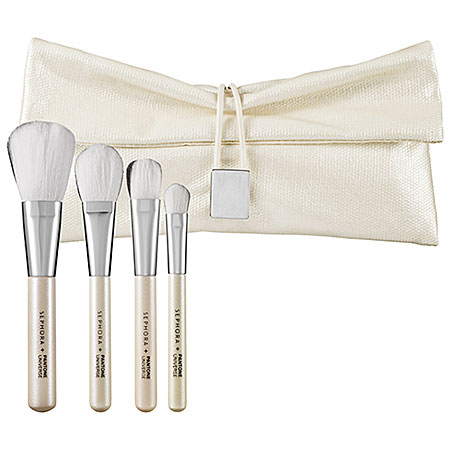
    Housed in a large silver makeup bag, the Luminous Brush Set is made up of eight brushes, all super-soft synthetics. (Well, I mean, not the brow/lash comb, but then, those never are.)

    I’m not usually a fan of bags that come as part of a set, but Sephora really knocked it out of the park with their Fall/Winter makeup brush sets’ bags, both in their Sephora Collection line and in the Sephora + Pantone Universe one. This one’s much larger than most–9 1/2″ tall, 7 1/4″ wide, and 2 1/2″ deep–and while the brushes make this set worthwhile on their own, the bag really takes it that extra step.

    The individual brushes

    The Luminous set includes eight brushes, but I’m going to count it as six — no one actually needs as many brow/lash combs as they’ll end up with after buying a makeup brush set or two, and the powder brush in this set is okay, but pretty sub-par compared to everything else. (Cheap powder brushes are just so floppy, you know?)

    I liked the liner & concealer brushes, in particular — the concealer brush is just the right mix of soft & firm, making it easy to blend cream products seamlessly around the eyes and nose. The liner brush is really good, too: tiny and flat, it pairs well with gel liner for a sharp, easy-to-control line.

    Another honourable mention is the unexpectedly soft smudge brush. These tend to be stiff, which really irritates my eyes, but this one was a great shape for getting blending around the lashline (or applying along it, for smaller eyes) — without feeling like a porous wooden stick.

    The finishing touches

    All of these brushes are labelled on the handle (both in English and French, though I’m not sure if that’s the same in the US), making them perfect for the beauty beginner. It’s just a little thing, and I’m not terribly strict with my use-what-where rules, but it’s a nice touch!

    The verdict?

    I’d really hesitate to recommend this at its original price, but at $34 US / $41 CAD (seriously!) this set’s an absolutely brilliant deal. While not top-grade brushes, they’re all very good, and the types & shapes have all been picked out quite well. Plus, the bag is a great find — a little flashy, but the size & easy-to-clean surfaces mean I’ll definitely be keeping it around.

    With a markdown this good, I’m not sure if it’ll still be around by Christmas, so pick up a set (or two) now — it would make the perfect gift for someone just getting into makeup, and at that price, I’d recommend it as a soft, synthetic brush set for yourself, too.

    Keep reading! »

    Share:

    Sephora Friends & Family 2012: What to expect instead

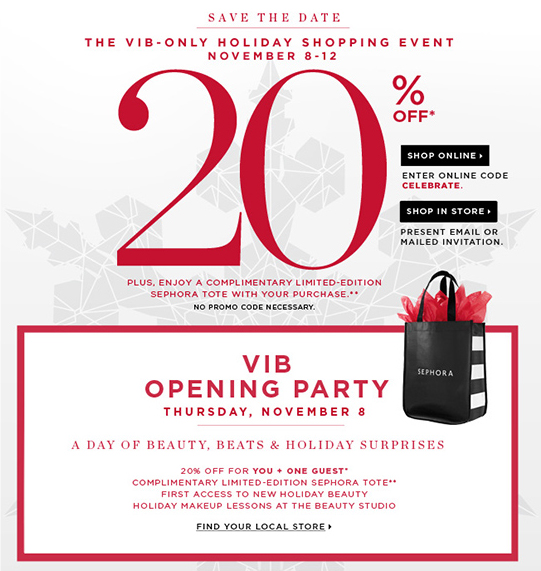
    Just a quick heads-up that Sephora’s annual 20% off sale is now live, but with a few alterations from previous years! From now until the 12th, [ETA: American] VIBs will be able to use the code CELEBRATE for their online discount. To get the same deal in-store, you’ll need to bring in a hard copy of the event — there should be an email in your inbox for it, or you should have received a card recently in the mail.

    (Ah, snail mail. How I love thee.)

    But what about the BIs?

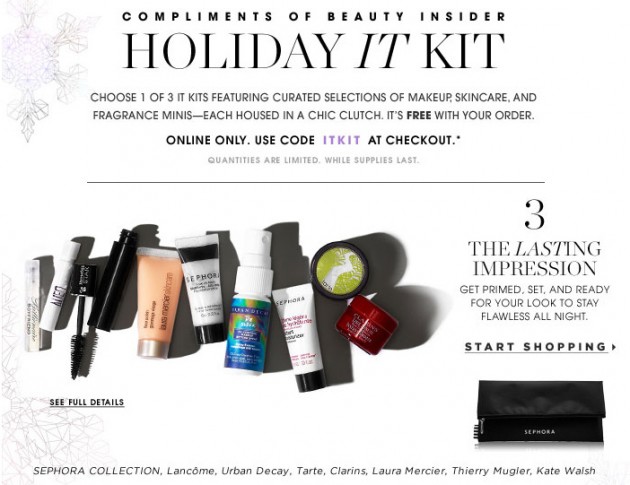
    If you missed out on the F&F sale this year (which was a literal friends-and-family-only event), Beauty Insiders can still take part in the holiday festivities — and if you’re not spending a lot, it might just be a better deal! With any order over $25, use the code ITKIT for a free nine-piece sample kit, of your choice.

    (The selections are pretty cool, but the quantities are limited. Stop reading theNotice and get over there now!)

    Happy shopping! Hope you’re all safe & warm indoors this week.

    Share:

    Sephora + Pantone Universe Luminous Brush Set

    Coming up sometime in the (hopefully) not-too-distant future. This is a fall release, with the Sephora + Pantone Universe Alchemy of Color collection, but I think it would make a great holiday gift or starter brush set!

    SEPHORA + PANTONE UNIVERSE Luminous Brush Set, $34.00US / $41.00 CAD (50% off). 

    Share:

    Karl Lagerfeld x Shu Uemura | Shu Uemura Eyelash Curler review, photos

    The product: karl lagerfeld for shu uemura Eyelash Curl & Karl

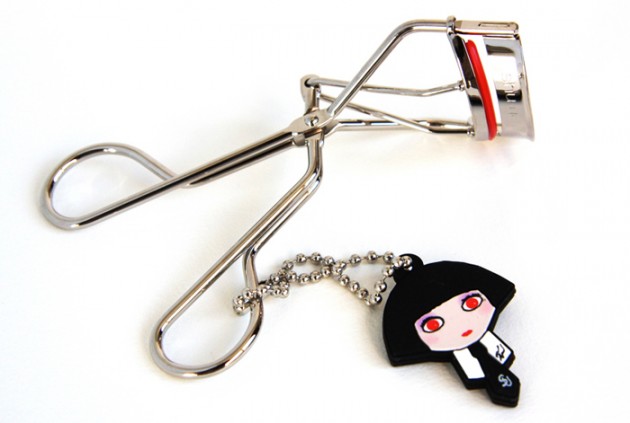
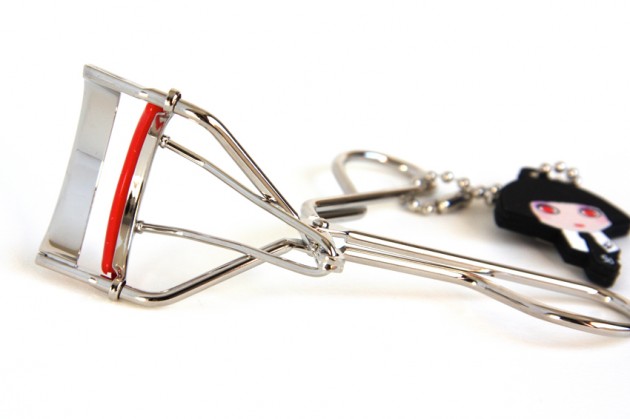
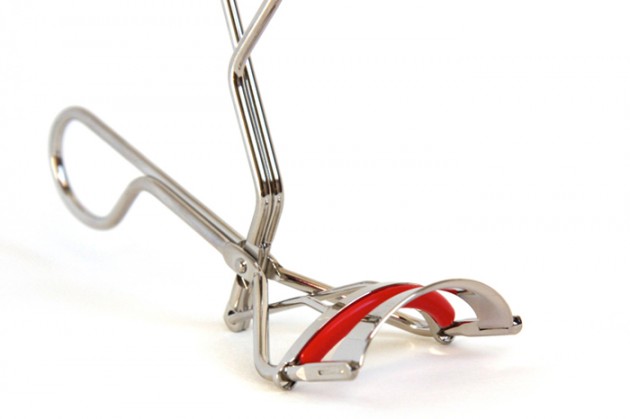
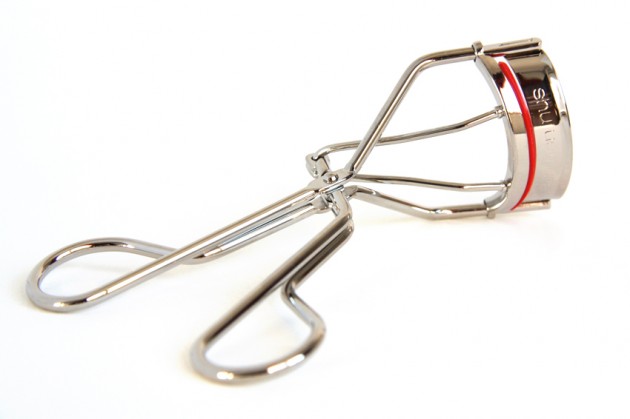
    Out this month with the Holiday 2012 Mon Shu collection is the Eyelash Curl & Karl, a limited-edition version of the classic Shu eyelash curler. This one comes with a red silicone pad (plus a spare), as well as a little detachable Mon Shu keychain looped through the tool.

    Creepy red-eyed keychain or not, I have to say: the curler’s cute! I love the classic silver-on-black aesthetic, but sometimes it’s nice to mix it up a little, you know? (I’m still tempted to pick up the matte black MAC + Carine Roitfeld Full Lash Curler, which is ridiculous. I really, really don’t need any more lash curlers!)

    The aesthetic aside, though, I wasn’t terribly smitten with the design of the Shu Uemura curler. It’s sturdy, but it’s also on the stiff side — I found myself having to go over my lashes two or three times (squeezing hard and curling 3x from base to tip each time) just to get a curl in.

    The opening’s a little on the small side (vertically), too. I think it’ll keep the curler in good shape for longer, but it was just too hard to get all of my lashes in, a problem I’ve never had before. With my stick-straight, downward-pointing Asian eyelashes, I really had to work at getting them all in there, which I just don’t think you should ever have to do with a curler.

    So, how about that shape?

    I would personally recommend the Shu Uemura curler for someone with fairly curved eyes (so, not monolids) and lashes that need a bit of a boost, but aren’t stick-straight to begin with (again, not Asian lashes.) I’ve always been puzzled as to how something like this came out of Japan, but, well — to each her own, I suppose!

    The verdict?

    The Shu eyelash curler doesn’t fit my eye shape, unfortunately, but I don’t want to write it off entirely. I do know a lot of bloggers who are very happy with theirs, and if you have slightly-curled lashes on a curved lashline and a good, strong grip, this LE version might be worth a look.

    (I’m not kidding about the grip, you guys. You really need to squeeze! with this one.)

    The Eyelash Curl & Karl is $4 more than the regular Shu Uemura curler (putting it at $24 USD / $24 CAD), but it’s essentially the same product. If you’re a fan of the classic curler & need a replacement, have a look at this styled-up edition, too.

    Keep reading! »

    Share:

    New 04/11/12: Holiday 2012 from Lancome, Dior, Bobbi Brown, & more

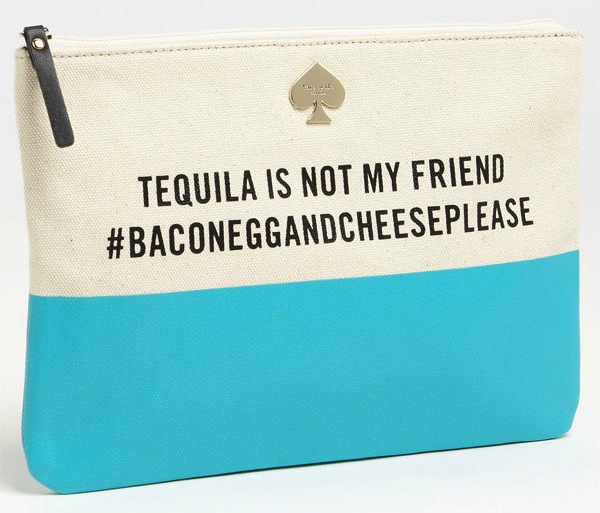
    Okay, so I know we usually start off this shindig with a a box of assorted products, but how great is this Kate Spade pouch? C’mon, you can’t not love this.

    Let’s get on with the show

    Holiday (and Autumn/Winter, for that matter) collections need no real introduction, so without further adieu:

    A surprising(ly awesome) markdown

    You know that Sephora + Pantone Universe brush set I was besotted with all last month? For whatever reason, it’s magically been marked down to $25 on the Canadian Sephora site, which I can very much get behind.

    At half price, I very much recommend the set — heck, I’d pay that much just for the blush brush! (I’m super into the blush brush, okay? Don’t mock; it’s fantastic for a sharp, clean contour.)

    Choose Your Black

    Whether you’re a kohl, long-wear, gel, or cake eyeliner kind of gal, Bobbi has a black for you. (The collection technically includes an eyeliner brush as well, but as a black liner fiend–seriously; I have more black eyeliners than I have lip balms, and that’s saying something–it somehow seemed much less important when I was putting this post together.)

    Share:

    Tread lightly, because these Alchemy of Colour polishes might just turn to gold | Sephora + Pantone Universe Jewel Lacquer review, photos, swatches

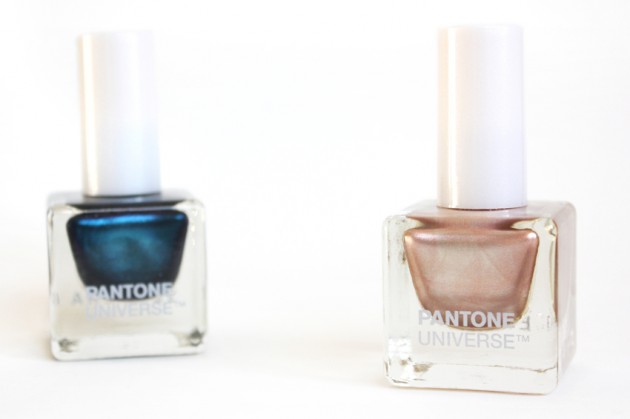
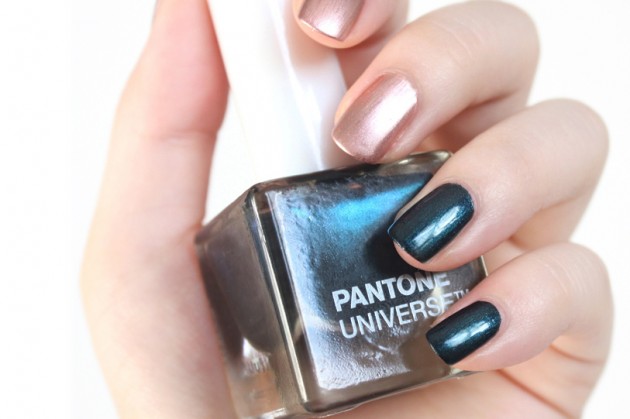
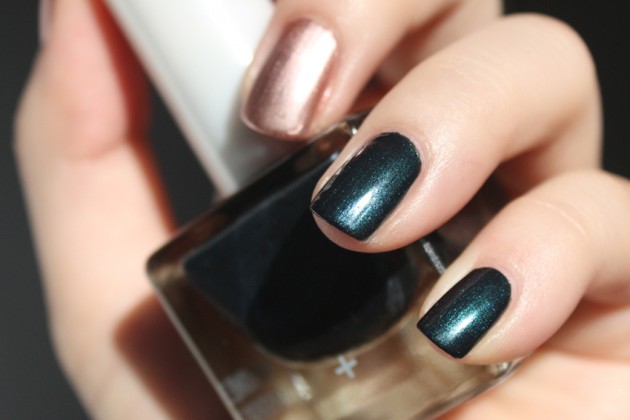
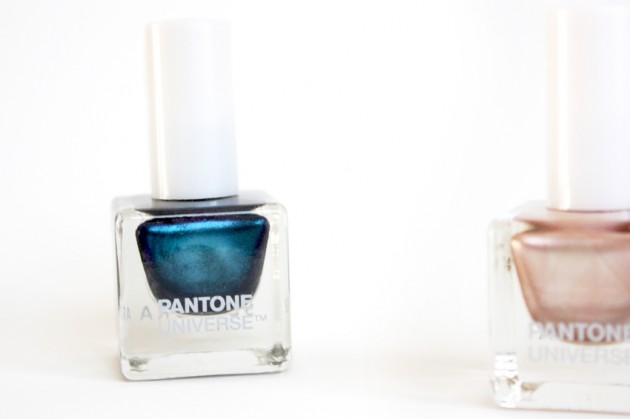
    The product: SEPHORA + PANTONE UNIVERSE Jewel Laquer in Reflecting Pond and Rose Dawn

    The formaldehyde- and DBP-free polishes in this season’s Sephora + Pantone Alchemy of Colour collection draw inspiration from the Pantone A/W 12-13 colour planner, predicting bright reds, oranges, and purples. 

    While it’s not the most cohesive of collections, the “futuristic finishes” of the polishes (first seen here on theNotice) are a really nice break from the usual shimmer/creme dichotomy. With everything from metallic mattes to duochrome green/violets, I think nail geeks–a group of which I cannot yet include myself in, unfortunately–are going to have a lot of fun with this one.

    Rose Dawn

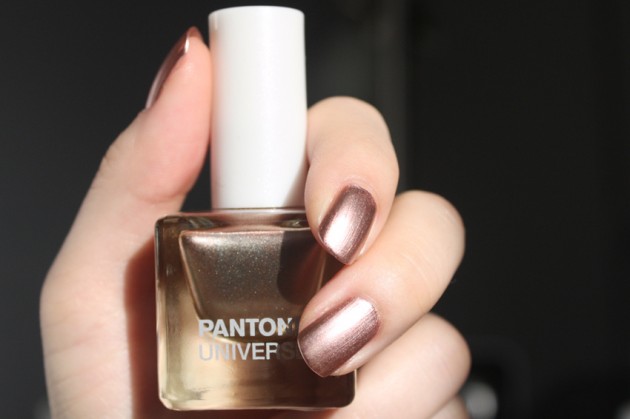
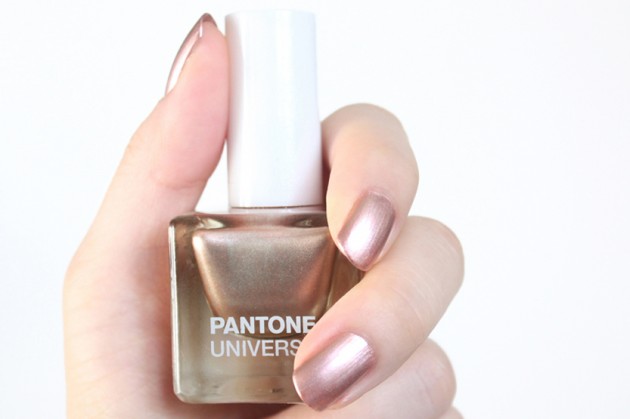
    Of all the shades, from what I’ve read online, Rose Dawn is the one that’s got that extra something. A “metallic matte” that’s very on-trend with its rose gold hue, the one-coater formula is a dream to work with — but really requires precision.

    I went with two coats for these swatches, just in case. With a little more awesome (read: a steadier hand), though, one coat definitely would have done the trick. Like any metallic polish, this one will need your brush strokes to be super-straight, but the finely-milled shimmer is more forgiving than most.

    Rose Dawn, in one word, is stunning. Trendy but timeless, and in an honestly gorgeous formula, finish, and shade, it’s kind of a must-have!

    Reflecting Pond

    Where Rose Dawn was a brilliantly opaque metallic finish, the formula of Reflecting Pond was quite different — as to be expected with different finishes, but still, I was pretty surprised at the difference.

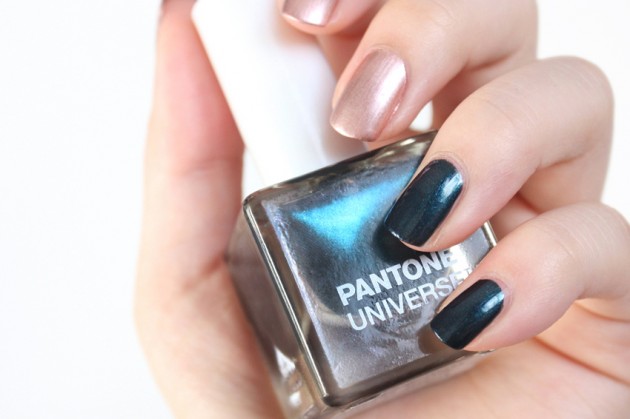
     More blue than I had expected, Reflecting Pond has a pretty (if fairly standard) shimmer finish, needing two or three coats for full opacity. Though not as opaque, the formula’s a little easier to work with (metallics always need super-straight strokes), and the greenish-blue shade is a stunner; perhaps even moreso on the nails than in the bottle.

    With a bit of a green-blue duochrome, the varnish reads more green on the nails than in the bottle, and the shade is just gorgeous — not quite a jewel tone, but not a standard blue, either. 
    The verdict?

    While the formula’s not perfect, the jaw-droppingly gorgeous shades take these SEPHORA + PANTONE UNIVERSE Jewel Lacquers from pretty alright to don’t miss this.
    These two weren’t exactly I was expecting (definitely look up swatches online for the other polishes if you’re interested), but I was nonetheless impressed with what Pantone brought to the table with Rose Gold and Reflecting Pond. At $11 CAD, the pricing’s not bad, and I think you’ll find they managed to slip some pretty cool polishes into the Alchemy of Colour collection.

    Keep reading! »

    Share:

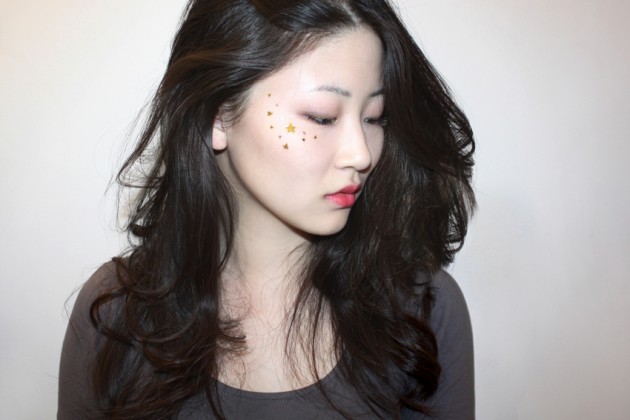
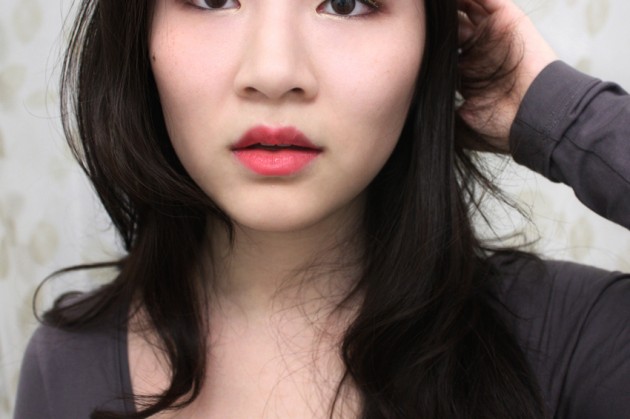
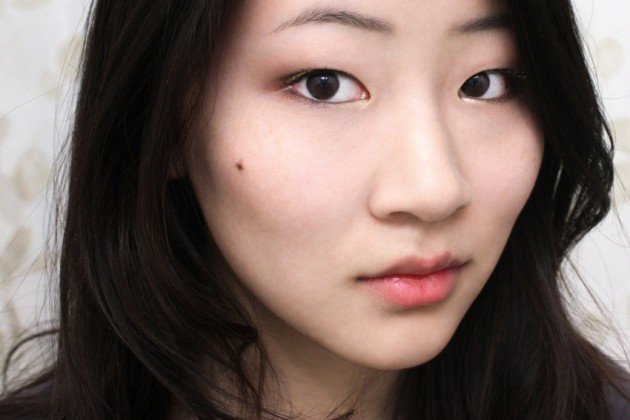
    A last-minute Halloween idea: Star-studded beauty

    I’ll be the first to admit that I’m awful at planning things in advance, as you might have noticed. (Full disclosure; I managed to schedule tomorrow’s review for this morning. It was up for a little over three hours, so if any of you are wondering where it went — well, went to go hide behind Nov. 1st for the meantime.)

    So, here’s one for all of you who want a cool, wearable Halloween look that requires almost no planning. Because, let’s be honest, sometimes planning is just one of those things that should (but totally never manages to) happen.

    For a full tutorial, don’t miss this post on She Said Beauty! 

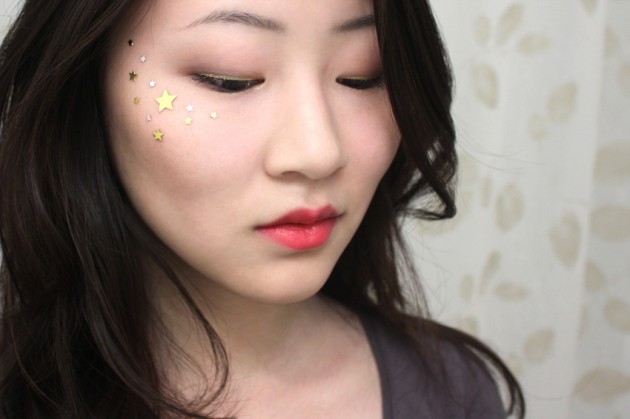
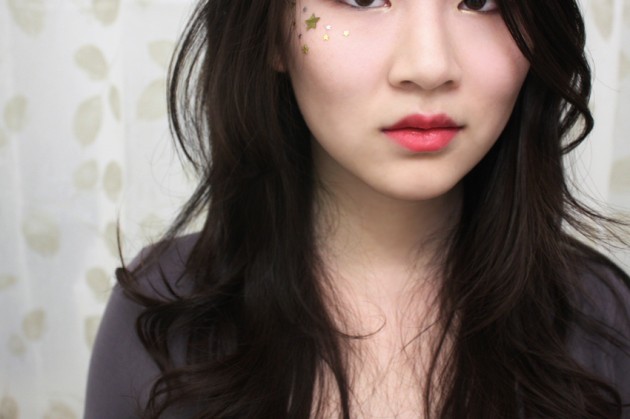
    Not just easy to co-ordinate, this look is pretty easy to assemble, too. Start out with a basic face; medium-coverage foundation; plenty of powder and contouring. The lip and cheek colours are up to you (I love a good reddish lip in the fall), as is the brow shape — just make sure to fill them; with a focal point away from your eyes, you’ll want to make sure they’re still adequately framed.

    If you’re adding illuminator to your cheekbones, try to pick a powder product to get better wear out of the stars.

    Start your eyes with a basic, matte smokey eye, then add a little bit of interest for Halloween’s sake. I went with a metallic gold, lining my upper lashline with LUSH Fantasy & taking Fyrinnae Polar Bear through the inner corners. Then, after mascara, I took Fantasy along a few of the tips of my upper lashes, too. (You can see it more in the flash photo, later in this post.)

    Another option that’s just as easy is to sparkle with pointed intent — pick a loose pigment with a larger particle size of shimmer, then pat it onto the middle of your lids and/or the inner corners. Don’t blend it too well, leaving it instead to juxtapose with the matte lid shades, and choose something with coloured reflects (eg. red at an angle or with flash, but unnoticeable straight-on) for extra impact.

    From there, grab some lash glue & craft store confetti to take the look from pretty to Halloween-levels-of-awesome. I kind of cheated on both, to be honest; instead of lash glue, I used an Annabelle Glitterama Liquid Eyeliner (glitter liners are my stash secret for when I’m out of proper fixatives) & picked the gold and silver stars out of a rainbow mix of loose stars.

    What? It’s not poor planning; it’s totally innovation.

    Keep reading! »

    Share:

    Trick or Tweet: Sephora Nail Patch Art Giveaway

    What could be more perfect for Halloween than sparkly (seriously sparkly; these things are a little intimidating) orange and red nail polish appliqués? I keep meaning to do giveaways (and then forgetting about them), so here’s a little flash giveaway for today.

    To win a set of Sephora Collection Nail Patch Art stickers in Orange Sunset, follow @theNotice on Twitter & tweet me the name of your favourite Halloween treat. For an extra entry, RT this tweet!

    This giveaway is open internationally (as long as you have an active postal address & you’re legally allowed to enter; I’m not hiking through the Appalachians just your prize to you.) You have until midnight today to get your entries in, so good luck!

    Have a safe & happy Halloween, everyone :) 

    Share:

    How-to: Dramatic smokey eyes (with a bit of extra sparkle)

    I warned you that there’d be a lot of this black smokey eye this month, but I promise — this is the last post focusing on it! I really loved the look, though, and I wanted to share a step-by-step how-to before leaving it behind and moving on.

    It’s a really high-impact look that’s surprisingly easy to do, so keep reading for all of the tips & tricks that’ll give your smokey eye that extra oomph.

    (Holy crap, I just realized that contouring is like a push-up bra… for your face. I never anticipated needing to use these words, but: I have to tweet this.)

    A smokey eye tutorial with an extra edge

    [ What does it even mean to “have edge;” is “edge” actually a thing that you can have? And if it is, is your worth determined by the number of edges you have, or is edge a singular entity of varying size? Is this all just a muddy anecdote having to do with metaphorical sharpness? ]

    Start off the look with a black cream base, applying it quickly (before it sets) but not worrying too much about the edges. I used an Annabelle SmudgePaint in Glitzy Black, LE this fall — the creamy texture and solidly-setting formula make it a great choice for a smokey eye, and the intense black-plus-shimmer shade made it perfect for this look.

    (Make sure you get it through your lashes, too, or the final look will end up more crazy than classy.)

    You’ll need to follow up with a shimmery black powder eyeshadow (or a black eyeshadow and a shimmery one, separately,) so I swatched a few different products and picked the most intense.

    From L-R, below: (1) NYX Eyeshadow in Black + FaceFront Artistic Pigment in Silver Fox; (2) the black from Clarins’ Mineral Eye Quartet in Graphites; (3) FaceFront Pressed Eyeshadow in Printed + Artistic Pigment in Silver Fox; (4) MAC Pigment in Dark Soul.


    I could have gotten a better shimmer density with Dark Soul, but MAC pigments are so finicky to work with — and I didn’t want the look to be all bark with no bite, you know?

    I ended up using NYX’s black eyeshadow (ridiculously buttery and pigmented, for the price) layered underneath FaceFront Silver Fox, but we’ll deal with the shimmer in a minute. First, just take the black eyeshadow overtop your cream base, using it to give shape and blend out the cream liner’s harsh(er) edges.

    From there, pull the black eyeshadow through your lower lashline, take a step back and re-evaluate: it’ll change how your eyes are weighted, visually, and I often find I have to go back and add height to the eyeshadow on my lids at this point.

    Follow up with black liner along your waterlines (if you used a shimmery base, swap it out for something with a cream finish), then move on to filling your brows. Pick something with a bit of a cooler tone, and don’t be afraid to mix a bit of grey into your usual shade to get the right shade!

    Keep reading! »

    Share: