Follow:
Search results for:

harmony

    FOTD: So you had a bad day

    It’s strange to think that lighting could be too good, but in a way, this was — it was glaringly bright, and the sun was right in my face! So, sorry for the quality of some of these images. The sun was quite lovely for napping in, though. Five levels of comfortable heaven :)

    All you need to know about this look is that I got in a fight with someone in my friend group… over my blog. Which really gave me two options: mope about it, or play with falsies.

    Well, I’ve never really been one to mope.

    More photos + products used behind the cut!

    I love these falsies!!

    Direct sunlight
    Click any to enlarge… I couldn’t settle on just one shot; the first was taken from too low down, the second from too far to the side, and the third is slightly off-focus. Talk about frustrating!

    Used:

    Revlon “Defining” false lashes, trimmed down by hand
    Urban Decay 24/7 Liner, Zero
    Fresh Supernova mascara
    NYX Jumbo Eye Pencil, Milk
    Senna eye shadows, Twilight and Spinx

    Lancome Blush Subtil, Rose Fresque
    GOSH Velvet Touch lipstick, Darling
    MAC Powder Blush, Harmony
    Bobbi Brown face powder, pale yellow

    Share:

    Finally, a FOTD! Inspiration: Sephora Spring 2010

    Question: What is the difference between these two girls, out of the recent Sephora catologue?


    Answer: Photoshop. I’m 95% sure that they’re actually the same girl, with vastly different post-photography work — the same makeup, the same gorgeously enhanced hair, the same brow growth and iris patterns. But hey; I could be wrong. After all, an amazing photoshopper could probably make freakin’ Bill Clinton look like these girls.


    Anyhow, I was really loving the pink on this girl! So, after altering the look to work a little better with my monolids, I went for a similar but more natural look. 


    And then I added falsies.


    For products used, a how-to, and a ton more photos (including eye shots,) go behind the cut! (Seriously, a ton more photos… as in, enough that I felt the need for both a warning and a cut.)

    How-to

    This look was super basic, so the tutorial for it will be very basic as well! Start by patting a peachy hilight into your inner corner, making sure to really hilight the inner V. Then, sweep a light pink over the outer 2/3 of your lid. Finally, grab a darker pink/burgundy and blend it gently into the outer corner. To finish your eyes, line with a black eyeliner, creating a wing at the end — I chose to do a very subtle one, but you could go all-out with the cat eye! Feel free to crimp lashes and add mascara or falsies.


    For the cheeks, contour lightly with a “normal” contour shade (a brown/taupe,) and then blend just slightly overtop that with a hot pink blush. Essentially, you’re contouring with colour.


    Lastly, I lined my lips with a clear liner and applied a sheer hot pink overtop using a lip brush to pull together the look, but still focus on the cheeks. For more “pop,” like in the first Sephora image, I would have done something more along the lines of this.

    Eye shots 
    …without false lashes or mascara


    …with false lashes (I’m actually not a huge fan of these; what do you think? I prefer falsies that add volume rather than those that add length.)


    And a bunch more full-face shots
    one without the lashes


    …two with falsies


    Used

    Cheeks
    MAC Harmony
    NARS Mata Hari


    Eyes
    MAC Blacktrack
    Lancome Rose Nuance
    Senna Smolder
    “Melon-ite,” aka that shadow that I blended that looks suspiciously like Melon but doesn’t actually have a name
    Revlon “Defining” false lashes


    Lips
    DuWop Reverse Lip Liner
    Wet ‘n Wild WildShine in Passionate

    Share:

    FOTD: Geometrical Christmas

    As much as I love Christmas’ cocktail-hour red lips and gold eyes, I thought I’d change it up a bit for today and try something a little more daring. It’s not something I’d wear to a holiday party, but it’s a little more fun! There’s something particularly bitchy about this look (there really isn’t any way to put it!) but I can’t quite put my finger on what it is.

    How-to:

    Start by applying a nude base to your lids. Then, foil a dark burgundy on the outer 2/3 of your eye, creating with it a large “wing”. Do NOT blend out the edges (this keeps the “geometrical” aspect of the look). Clean off your brush or switch brushes, then foil a gold shadow onto the inner 1/3 and along the entire lower lashline. Where the two shades meet on your upper lid, use the gold shadow (dry) to blend them.


    Follow the shape of the wing and line just above your upper lash line. Coat lashes with mascara. To emphasise the shape even further, clean around the edges with a q-tip and sweep a shadow the same shade as your natural skintone around the burgundy/gold shadow.


    Finish with pink or apricot cheeks, then your choice of a nude or red lip.


    I wanted to try this both with a nude lip (the traditional “wear a light lip if you have a heavier eye” thing) and a darker red one. For the former I used a clear gloss with a touch of shimmer, and for the latter I used a burgundy lip liner and topped it with a glossy lip conditioner. They’re both… interesting.

    The light lip:

    The dark lip:
    (Caution; scary lip swatches ahead!)

    MAC Burgundy lip liner

    MAC Burgundy lip liner, topped with MAC Plum Perfect TLC

    What I used:
    Lips

    CoverGirl AmazeMint in Happy Hour
    MAC Burgundy lip liner
    MAC Plum Perfect TLC

    Eyes

    Senna Intrigue and Smolder eyeshadows
    MAC Naked and Mauvement pigments
    MAC Fresco CCB
    Fyrinnae Polar Bear pigment
    Lancome Positive eyeshadow
    Rimmel Lycra Lash Extender mascara
    Urban Decay Primer Potion
    Annabelle liquid liner

    Cheeks

    MAC Harmony
    Lancome Rose Fresque

    Share:

    Violet FOTD: still waiting to see the sun

    Man, it feels like I haven’t posted a FOTD in ages!! There hasn’t even been a point to trying to do makeup over the past few weeks, because it photographs like crap — it’s dark when I wake up and dim when I get home, boo :( As a result, my macro shots are blurry and my full-face shots have to be taken with flash and colour-corrected to no end.

    But you’re not here to hear me bitch about how hard it was to get these photos to you guys! Nope, you’re here to see ’em. So: onwards!

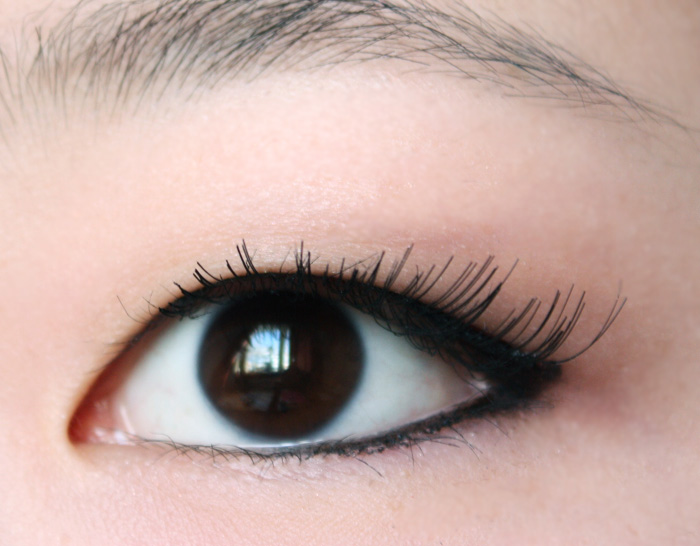
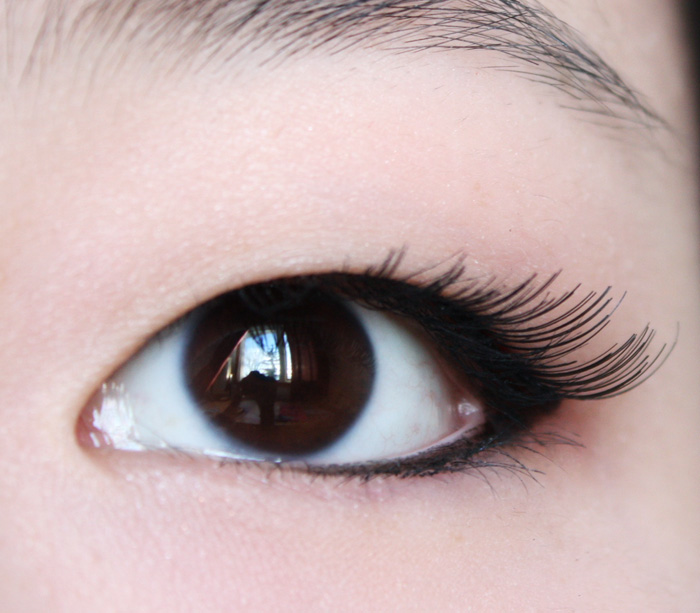
    A couple awful macro shots:How-to (I know it’s long, but I promise the look is actually quite easy! Plus, once you’ve mastered the technique, you can use it to create a fast smokey eye of any colour.)

    I started by creating a basic black and white smokey eye. Fill the inner 1/3 of your upper lid with a white cream base and blend out. Then, pat on a black base on the outer 2/3, and intensify the outer V with a black shadow. (All products used so far have been matte.)


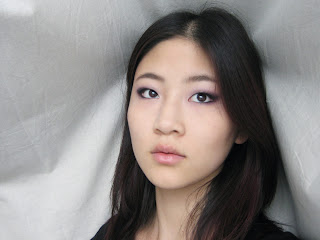
    Following this I went over the look with a vivid violet — still matte — and blended well, pulling the colour slightly out off the black base. I took it down underneath the lower lashline as well, about 2/3 of the way in. To complete this stage, I blended out the edges one more time with a shimmery low-pigment violet shadow, also popping a bit of this in the middle of the lid.


    Finally, I patted shimmery pigments overtop, using a lighter one for the inner portion and a darker one on the outer portion. (Don’t forget to do this on the bottom as well as the top!) Line upper lashline and both waterlines, fill brows lightly if needed, add mascara, and keep the cheeks light. (I contoured my cheeks that morning, about nine hours prior, and wore pink blush — so, all I had to do was leave it on!)

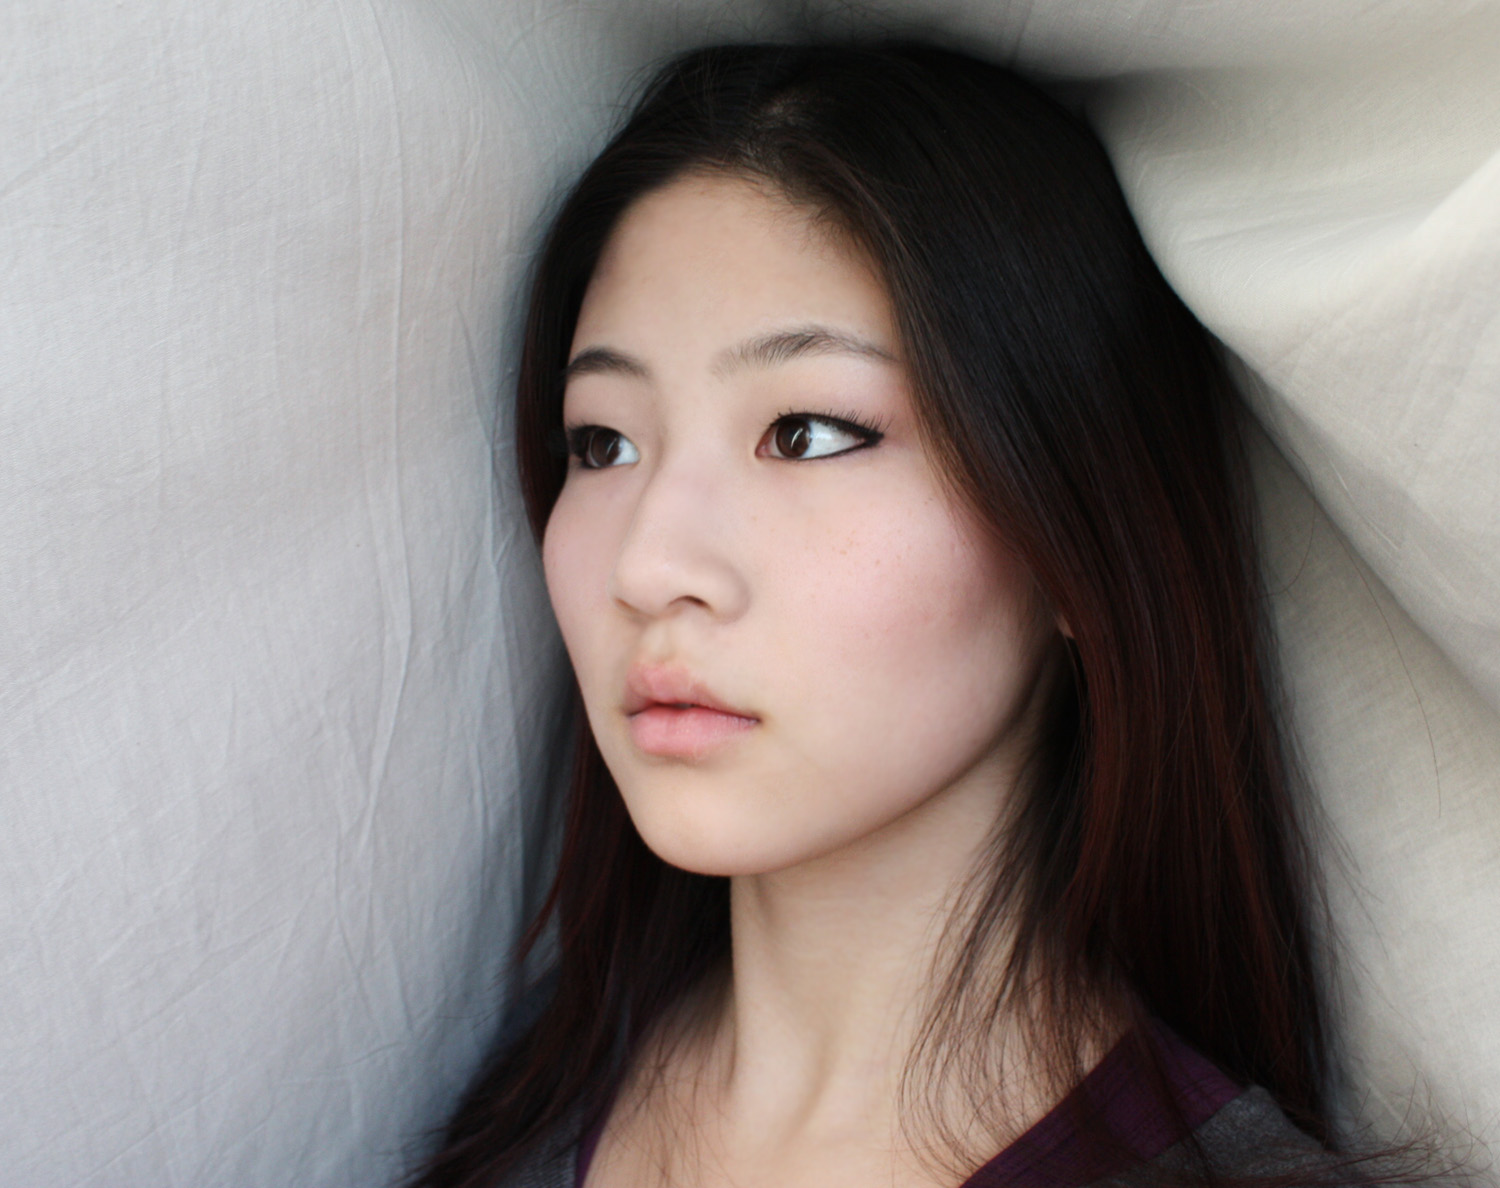
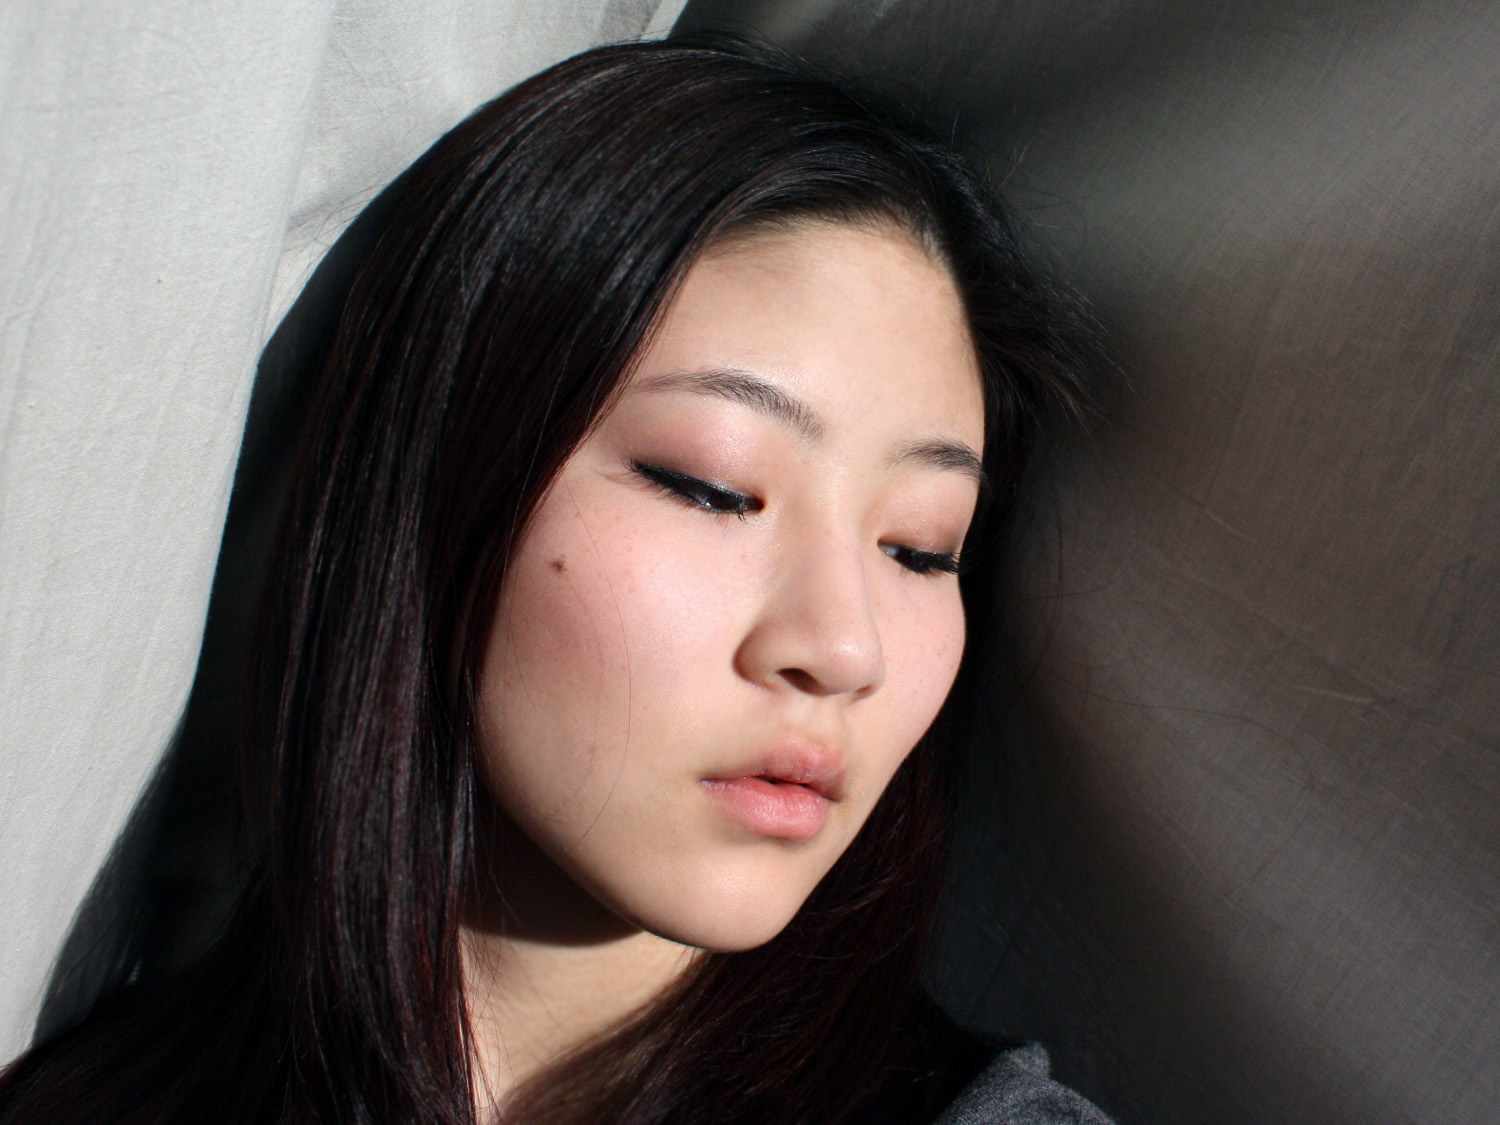
    With a nude lip: (Besamé Vanilla)
    These images were taken with flash, so I have no idea how in the hell they turned out alright.
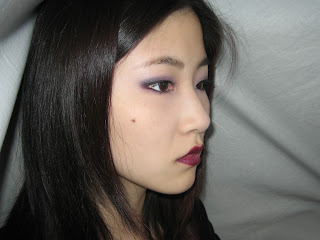
    Aaaand then I was bored, and wanted to keep showing you guys the difference between a look with a nude lip and the same look with a statement lip. So I did the following with some liners to give it depth (MAC Currant, Vino, and Mauve) and topped with a dark red-burgendy balm to blend it all together (MAC’s Tinted Lip Conditioner in Plum Perfect).

    Here’s the look with burgundy lips! Mother calls it the “hooker look.” (Well, that’s a lie. She cringed and said “it, um… looks like you’re going to go clubbing, Rae.” I called it the whore look, and she laughed. Not to say that it is! It’s just WAY bolder than I usually go.)

    These shots were taken with flash as well, but for whatever reason look WAY WEIRDER than the others.

    (nnrrgh I look funny in flash.) (and stoned. Very stoned.)

    Stuff used for the black smokey eye:

    MAC Blacktrack (black base)
    NYX Milk (jumbo pencil)
    Smashbox Midnight Black (black shadow)

    Stuff used for to turn it into a violet smokey eye:

    MUFE 92 (matte violet shadow)
    Lancome Angora (shimmery, sheer lavender shadow)
    MAC Vanilla and Mauvement pigments (the lighter and darker ones, respectively)

    And, finally, the extremities:

    Rimmel Lycra Lash Extender (mascara)
    UD 24/7 in Zero (black liner for the waterline)
    MAC Blacktrack (to line the upper lashline)
    NARS Mata Hari (pink blush)
    MAC Harmony (to contour cheeks)


    Hope you liked it! I was really happy with how it turned out in real life (seeing as violet is pretty much my favourite colour!) The worst part was having to take it off eventually =(

    Share:

    Hair show FOTD

    I’ve finally gotten around to cropping and resizing these, so here you go! Unfortunately, it was grey and windy by the time I got home, so my curls were mostly out and a lot of the photos were blurred (my camera has some trouble focusing in low light conditions.) This is the look, after about six hours!

    Vanilla pigment all over the lid, Fiberwing mascara, and a mix of GOSH Pretty Petrol and some Coastal Scents sample on the lower lash line. Quick and easy – I didn’t want any possibility of having to retouch during the day. (And I didn’t have to. This simple look held up great!)
    Lancome Rose Fresque on the cheeks, MAC Harmony to contour. This is my favourite cheek combination right now, which is why you’re seeing it so often! Bare lips.
    Because I’m freaking awesome (well, not really – it’s because of good planning) this is all I had to take with me! Small baggies of the pigments, an angled brush (all in one zippered bag, might I add) as well as some concealer, mascara, and silica powder (which I wanted my friend to try for her oily skin).

    Share:

    How much is your face worth?

    That’s right, ladies. How much is your face, right at this moment, worth?

    I’d like you to quickly add up the raw value of the products you used this morning. It doesn’t have to be perfect, feel free to guess (ie $20 instead of $18.50)! Go ahead and check sites like Sephora, Ulta, MAC, or drugstore.com if you have no idea!! Everything on your face – that includes primer, moisturizer, and toner, but not things like cleanser, which have been rinsed off. And we’ll pass on tools, because you could *theoretically* go without. (ew)

    I’m itching to know just how much we really spend on our faces. And also cringing at how much it’ll probably end up to be.

    SKIN
    Olay Total Effects fragrance-free moisturizer – $20
    Smashbox Photo Finish to go – $20
    Total: $40

    BASE
    Boots No. 7 Radiant Glow Concealer, shade II – $20
    TheBalm Time Balm concealer, “Lighter Than Light” – $25
    Coastal Scents Silica Powder – $5
    Total: $50

    EYES
    Laura Geller Eye Stay Duo, “Lilac/Orchid” (lilac used) – $20
    Lancome Color Design shadows, “Cremé Lustre” and “Mochaccino” (both from quads) – $15
    Lancome Color Dose cream shadow mini – $10
    Total: $45

    CHEEKS
    MAC Harmony blush – $20
    Lancome Blush Subtil, “Rose Fresque” – $37
    Total: $57

    LIPS
    Palmer’s cocoa butter stick – $3
    Stila Lip Glaze, “Brown Sugar” – $20
    Total: $23

    When I take them all and add ’em up, I get…

    $215


    I believe this is when I go… awww, hell naw!

    (And I will assume that I have correctly utilized this phrase. It’s awkward for me and I do not plan on ever using it in real life but I have been led to think that this would be an appropriate time for it and there is no better phrase to suit the moment?)

    Share:

    Popping my MAC cherry

    Can you believe that, the junkie I am, I’ve never bought anything at MAC? (Actually, I can…)

    So. As an early birthday gift, my aunt brought me into MAC and told me that I could pick out anything (or multiple anythings, but I didn’t want to tax her – she had already brought me some gorgeous pottery from LA. She has her own oven-thingy and everything!) (Also, I am aware that “anythings” is not, in fact, a word.)

    Though I didn’t care for the SA too much, she wasn’t terrible. Like most of them, she was a little pushy, but she was also helpful enough to make up for it. The fake-happy voice and motions were a little too over the top for me – can you say “irritating”?

    I ended up with Harmony, to contour. I have light Asian skin – you’ve all seen it, right? (Or is that post still in backlogs…?)
    It’s perfect! Very pigmented, and though it definitely wears through the day, there is a noticeable difference when I wash my face at night – I ran a q-tip with baby oil through it to check at the end of the night, and I could see an obvious pale streak! Points for wearing time – it’s pretty great.

    I can see this lasting me next-to-forever, even with almost-daily use. A little goes a very long way – now I just need a small contour brush. The one I’ve been using thus far spreads on too much of this product!!

    The verdict: Fabulous!

    Share: