Follow:

    Bonus post…ish

    I’m so sorry about the lack of quality posts this week, guys :( If it makes you feel any better, I promise to post a couple of reviews and such next week!!

    To make up for it, here’s a teaser of an eye that I’m in love with (I’ll do a full post when I can), a swatch of my beloved GOSH liner (review updated here), and finally, some more photos of the NYC Chroma Face Glow (reviewed here). I’ve worn it every day this week, using my new fan brush, so I figured I’d give it a little more love on the blog as well. Isn’t she gorgeous?

    NYC:
    GOSH: (I know it’s not much, but as you can see – this is freaking gorgeous!)
    The eye:

    Share:

    One more photo dump – the haul!!

    I promise to have a “real post” very soon – but these were bound to go up anyhow, and why not have them up as soon as possible, before they’re irrelevant?

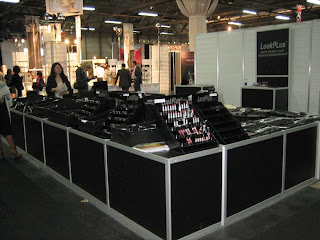
    As always, amazing selection and prices! I think the best part about buying product this way, though, is the atmosphere: hundreds of excited stylists and students, all buzzing about beauty and hair!

    Share:

    ABA 2009 photo dump

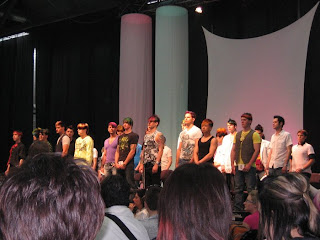
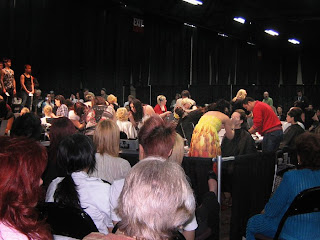
    The Edmonton ABA hair show was… great! I didn’t get to spend much time there (I went with a friend who had to go to church first, so we couldn’t get there until later in the day) so I didn’t get to see all the demos that I would have liked to, but it was still fantastic!

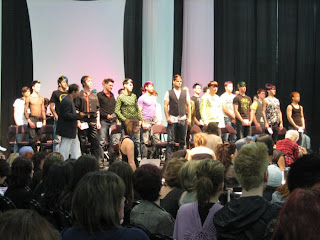
    Excuse the crap quality (it’s fairly dim in the competition area, so I had to screen the heck outta these on Photoshop just to get some contrast into them). Haul photos will be up tomorrow – I got some great stuff! – and I might post a photo of yeterday’s EOTD as well, depending on if I have time.

    Enjoy!I wish I could have seen Women’s Avant-Garde! Look at that gorgeous colour.

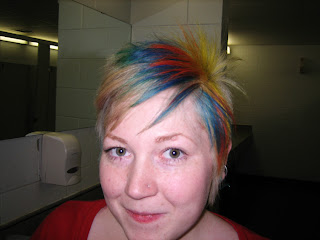
    How great is her colour? It’s about a week old (I had to ask) and absolutely stunning.

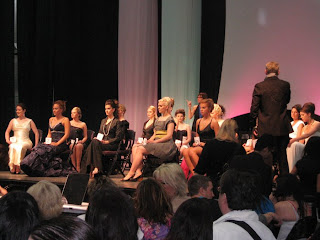
    Woman’s Elegant Evening Makeup. You couldn’t get up close, though, so that was kinda boring…

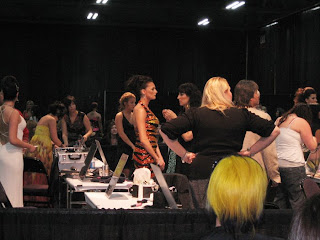
    Yowza! Since when was sparkley leopard-print “elegant”?

    Men’s… something or other.
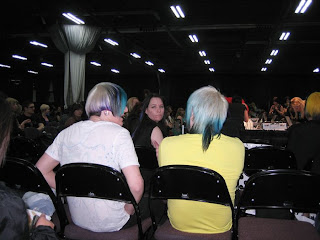
    Check out the bottom right of this pic for some great colour in an audiance member!

    The guy on the left had some gorgeous blues on the other side of his head, but he didn’t turn around (boo)
    And yes, they were hair models.


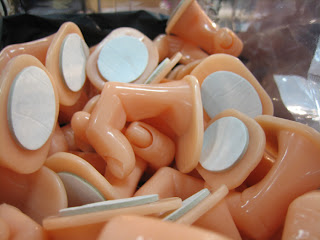
    Do I even need to say “OH MY FREAKING GOD THAT IS WEIRD?!”
    I didn’t think so.

    Overall: there was a lot more cheap makeup this year (see above). It was mainly low-quality stuff, but you really can’t beat the price. I wouldn’t get a whole collection at the hair show, but it was a great opportunity to pick up some things cheaply that I’m not sure if I’d get a lot of use out of. I can always buy the high-end equivilant if I like it!

    In terms of hair trends? Lots of platinum blonde with gorgeously vivid colours interspersed. Not a lot of super-bold super-brights, but more of very concentrated cotton-candy colours – the pinks, purples, blues…

    Share:

    Dirty, glittery, and glam.

    These turned out, unfortunately, blurrier than I wanted – but it’s bearable. I’ve since recreated this look with a little “twist”, so you’ll get to see those photos soon as well!

    You can create any of the four lips below, depending on where you stop, so read on!

    Fun, but wearable…ish.

    A little more glamorous, and harder to wear out

    A little more rockstar and a little less… lip-safe

    Totally not lip-safe.
    But also kinda awesome.

    What I used:

    -loose craft store glitter [DO NOT CONSUME]
    -black liquid liner
    -black pencil liner

    -clear gloss
    -concealer
    -light pink lip colour
    -lip balm

    Step one
    I always start a lip combination with lip balm – you should know that by now! Here’s a coat of my recent love, Bobbi Brown’s lip conditioner.

    Step two
    Conceal – as you all know, I’m using TimeBalm in Lighter than Light. A cream concealer will work best for this, but liquid would be alright as well (you’ll just get less coverage. If you’re using a powder, well, you better mix it with a tiny bit of lip balm first!

    Note that thoroughly concealing your lip line doesn’t matter – just the inner half or so.
    Step three
    I wanted contrast, but “fun” as well, so I picked a soft hot pink, and applied it mainly on the inner 3/4 (which won’t be lined). This is Iman Rubor, a stick blush, but I’m in love with it on my lips. It’s quite drying, which sucks, but pretty enough that I put up with it!

    (I’ll review it when I have time. I usually apply less, and it’s not over concealer, so it’s less BAM and more “ooh, pretty”)
    Step four
    Line with pencil liner so you know exactly where you’re starting and stopping your line! It’s easier to work with, for most, especially in the lip area.

    Here is my “lol I look like a freak” grin! It wasn’t very well conveyed without the squished up face and funny squeal…
    Step five
    Go over your pencil line with liquid liner to get a nice, opaque line. Make it as tick or thin as you wish! If you do make a mess, be sure to clean up the edges with a q-tip and non-oily makeup remover.

    Step six: optional stopping point #1
    Re-dip your liner brush into the liquid and wing your outline in! Where you put the wings is up to you, but I like mine to be fairly symmetrical on the top and bottom in terms of placement.

    Step seven: optional stopping point #2
    Dab on gloss. Pull side-to-side in a thick layer, staying within the black, and then pull carefully inwards. The more gloss you use, the less of a chance you have of messing up your lines, so make sure you pick something non-sticky and use a lot of it! I’m just using plain ‘ol Vaseline.

    Step eight
    : optional stopping point #3
    Use your pinky or ring finger with a little bit more gloss in order to “mess up” your liner, pulling inwards. Touch up or mess it up to your desire!


    Step nine:
    mandatory stopping point!
    Apply glitter, and you’re done! I’m using some Lazer Gems that I picked up at Michael’s ages ago, but anything will work. If you’re planning on wearing this about, please get lip-safe glitter (if that even exists?) and try not to lick your lips.

    Share:

    The Private Practice season finale

    Was fucking fabulous. Yes, so fabulous that it requires an expletive (don’t worry, I’m fairly certain that all of my readers are of an appropriate age. If not, well… their parents really need to be monitoring their computer usage a bit better!)

    I just… just, OH MY GOD.

    I’ll stop there, because I don’t want to spoil it for anyone!!

    Share:

    Best book ever?

    After staying up all night writing about Kafka’s The Metamorphosis and Marquez’ Chronicle of a Death Foretold (” “), I’m just too tired to post.

    So: list your favourite books, ladies! They can be anything from nonfiction to chick lit to crazy Russian shit. I’d love to hear ’em :)

    (Me: Twilight, of course! I also loved White Oleander and Paint it Black.)

    Share:
    2 Comments

    Posting throughout the summer

    As you all know, I’ll be gone for five weeks. I’ve been thinking about how to deal with this – to no avail! I don’t think I’ll have time to write five weeks worth of posts, with finals and everything coming up, and I leave two days after said finals end.

    So, does anyone have a solution for me? I’m considering buying a laptop through Craigslist/Kijiji etc, but I’ll only need it for the five weeks!! Can you, like, rent laptops or something? O.o

    Share:

    Blush – worth the splurge?

    Two words for ya: Hells. Yes.

    Now that we have that cleared up, and you’re all aware that you’re talking to a total blush whore, let’s get started!

    Why spend obscene amounts of money on blush?
    Well, actually, I’m recommending that you don’t. I know, I know – I’m very confusing and roundabout today. But this series is for the girl who only wants to own a couple blushes, not an entire stash of them. So I’m telling you to buy two expensive blushes, and be done with it!

    The only three blushes you’ll need to own:
    The shades depend on personal preference (we’ll go over that later), but I recommend that you have one “clear” matte or low-shimmer blush and one shimmery medium-to-sheer blush.

    Your clear colours are pinks, plums, apricots, etc. Depending on what you like and what you look like, this shade will vary! The great thing about high-end blush, though, is that you can try it on before buying it. So dedicate that hour to your favourite high-end store and walk out with the pefect one for you! Make sure it’s matte or very low shimmer, and gives you a subtle (but perfect!) lit-from-within hue.

    That matte blush can be layered with your shimmery one – which is why it needs to be matte! Ideally, your shimmery blush should be in strips/marbalized, so you can blend all the colurs to wear on its own, or wear just the low-pigment ones over your matte blush. Boom: with two blushes, you’ve just created five different blush looks! (The light parts of the shimmery blush on their own, a swirl of all of the shimmery blush on its own, the matte blush on its own, all of the shimmery blush over the matte blush, and just the light parts of the shimmery blush to hilight the matte blush)

    Wow. Talk about a mouthful.

    What to look for when you’re buying your cheek products
    Well, the first is obvious: make sure it looks good on you! But you also need to check pigmentation – the more pigmented it is, the less you’ll use at once. However, if you’re a beginner, too much pigment can be hard to work with! For the shimmery blush, pick out one with at least two shades, one that imparts a nice but not very pigmented glow, and one that you could wear on its own and would give you a nicely pigmented flush.

    When (not if!) you’re trying on the cheek product in-store, ask to apply it yourself to “get a feel for it” – just because it looked good when the MUA helped you with it doesn’t mean you’ll be able to achieve the same results at home. Wear it around for the day to check its wear and how it looks in different lighting before you make your decision.

    And lastly? Don’t forget to make sure you love the packaging! (Hey, if I’m forking over $30 for something smaller than my hand, it damn well better be luxe and make me feel like a queen every time I use it.)

    Great blush lines to check out
    Lancome knows how to make a great matte blush. Though I hate how their powder blushes smell in the pan, I’m in love with the product! Check out their Blush Subtil line for great pressed blushes – they’ve become the only powder blushes I wear on a daily basis. I’ve also totally fallen for their Color Design creme formula. A tiny press (not even a swipe! Just a press!) of my finger onto the pan of undeniable pigmented creaminess blends over my entire cheek.

    Clinique’s Fresh Bloom blushes are great for your shimmery pick – they’re very sheer and layerable, but beware! They’re also very soft and don’t travel well.

    NARS would be a great choice for your matte blush – these are also very pigmented. However, I can’t stand the gummy packaging (it gets dirty very quickly, and is basically impossible to clean) – and I know a lot of other makeup minimalists will be driven nuts by this as well. Their hilight/shimmery blushes are great, but they unfortunately only come in single pans without strips/marbelizing. They’d be great in a stash, but less optimal if you only want to own one shimery product.

    Cargo blushes are huge, and great quality, so check out the normal tins and BeachBlushes for a matte blush, and the BeachBlushes and SuedeBlushes for a shimmery one. The BBs have strips of colour, and the SBs are marbelized, so they’re perfect choices for your shimmery blush!

    Dior practically costs its weight in gold, but the regular line is a shimmery/matte duo – meaning one product will serve for both your matte and shimmery blushes. Just make sure you love them both!

    Lastly, MAC’s mineralized skinfinishes would be wonderful choices for your shimmery blush. And as an added bonus, a lot of the LE ones are being added to their regular collection this summer, so you won’t have to hunt them down online. They’re pricier than the regular line, but you’ll get more shade choice, and they’re bloody huge.

    That’s all I can tell you for now, folks. I’m sure there are heaps of other great blushes, but those are the ones I’ve tried and loved so far! Happy hauling.

    Share:

    Hard letdown

    Nivea Soft, you are my Holy Grail no more.

    I thought you were the answer. I thought your annoying scent, which turned into a much-welcomed one after only days, was the solution. I thought the way you didn’t make my t-zone oil up the way Olay did was heaven, and I thought that the soft, hydrated skin you left behind was forever. I thought it was true love!

    And then you went and clogged my pores, you cheating bastard.

    &xx


    In short, Nivea Soft = pore-clogging mess. I started breaking out a couple of weeks after starting to use this, but I persisted – it was the only thing hydrating enough! But after my skin didn’t clear up (and you know my skin. It tends to be quite clear!) I gave in, and stopped using Soft.

    Yes, I’m sure that it was in fact the moisturiser, and not something else. I used it for over a month, and in that period my skin started acting up. I let it go on for about two weeks before switching off Nivea and back to Olay. Two and a half weeks later, and my skin is pretty clear again, aside from the scars it left behind! I’m very thorough – it drives me nuts when people think the moisturiser they’ve tried for two days has given them acne.

    Any recommendations for something to help fade those scars would be wonderful! Albeit there are only six little scars, but it’s more than I’ve ever really had to deal with at once…

    Share: