Follow:

    Shiny, smooth kisser.

    That’s right. Not only do you have to be smooth, nowadays you have to be shiny as well :P

    What is it: Aura Science’s Shine glosses. Discontinued, so this’ll be short! After all, hemlines rise while the economy falls, right? If you remember, I’m also in love with their two-layered Reflect glosses. I love these more, though!! (But the Reflect applicators were way cooler.)

    (Stop that. The economy is an excuse to wear a cute miniskirt, not to pretend that shirt is a dress. WEAR PANTS… leggings don’t count!)

    My camera hates me and I’m a skint student.
    So photo is a little too orange.

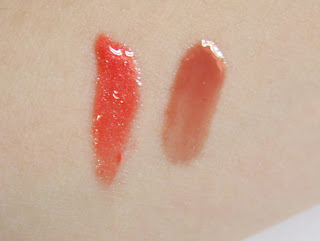
    Basically: they’re packed with shine, incredibly smooth, and absolutely gorgeous. I have Star Coral and Lippy Nude, both of which I adore! Star Coral is the wearable type of coral, and just a dab of it, sheered out, brightens and intensifies any other lip colour. Lippy Nude, on the other hand, is a stunning dusty plum. It’s pretty much what I’ve been looking for all my life — the shimmer-free MLBB gloss, perfect for a meeting with the boss or drinks with the girls.

    I’ll let the photos do the talking.

    Star Coral


    Lippy Nude

    The verdict? If you stumble across these in sale threads, definitely go for them. If not, don’t fret! I’m posting this today because I found a new gloss yesterday that I love just as much — honestly — as I love these. But I’m keeping the name and brand to myself until I post it… I promise I won’t leave you in suspense for too long!!

    Share:

    Yah, so I pretty much have the lamest hobby ever.

    I clean things. You know I do. I love to organize — and I’m pretty darn good at it if I may say so myself!

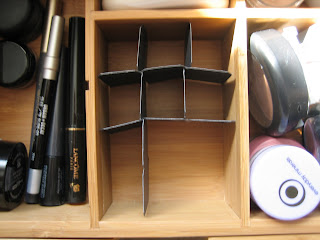
    Anyhow, with all the other beauty junkies making lipstick organizers, I figured I’d give it a go. It turned into a night-long project with lipstick and lip balm organizers, boxes, pencil and brush organizers…

    I’ll let the results speak for themselves. Scroll to the bottom if you need a hand making them!!
    How-to: boxes

    Measure. Cut. Fold. Not much to it :P

    How-to: organizers

    Cut two identical strips, use a drafting stencil to make the little notches (SO important, it takes them from “crappy five year old’s DIY” to “awesome”) on the tops. The bottoms, too, if you’d like — but it’s not like anyone’ll see them anyways!

    Slice halfway up from the bottom to the centre on one strip, then from the top to the centre on the other. Take another small slice to reduce “crowdedness” in the slots so that they’ll stand up without collapsing/folding into themselves!

    Share:

    I would give anything to give you my spoons.

    This one’s for Laura, and anyone else out there with a chronic illness that sometimes just needs to look in the mirror and go hey, I look healthy today. My sister always says there are two ends to the spectrum: people who are sick and don’t care how they look, and people who are sick and therefore want to look 100% put together. On bad days, my sister puts on pretty much a full face, and I’d bet it’s because it’s one thing you do have control over, and one thing that lets you pretend — just even for a little while — that life is normal.

    *mini-disclaimer: I know that everyone is different, especially in severity of illness, and I don’t claim to have any sort of “expertise”… but this is the beauty routine we worked out, so hopefully some of you ladies can find it useful as well.

    xx&

    Alternate title: the five-minute face

    Minute one:
    Apply a luminizing primer all over. If you don’t have a luminizer, here’s a quick DIY: scrape some of your favourite shimmery clear-colour powder blush into your palm (preferably a sheer pink). Mix in your primer or moisturizer, then smooth all over the face. Alternately you can put a bit of moisturiser on the back of your hand, then pick up some shimmery cream blush with your fingertips. Blend and apply.
    (Fibro doesn’t always exhibit itself on the face, so my sister doesn’t actually need to do this step — I added it in for other people, though, as a loss of “glow,” for lack of a better word, is common.)

    Minute two:
    Use your fingertips to smooth a creamy satin-finish or shimmery eyeshadow all over your lids. Keeping it sheer and/or skin-toned means that you don’t have to be as precise, but can still get a polished eye.
    (Why not a brush? For those of you who lead “normal” lives, I think you’ll be surprised at this answer. On a bad day, people with something like Lyme or Fibro find it hard to even hold pens and pencils… so skipping the brush not only makes it faster, it makes it possible.)

    Minute three:
    Line the upper lashline. We usually use a powder and a fine slanted brush, then smudge it with an all-over eye brush or fingertips (so it doesn’t have to be perfect.)
    Like with any eye, this is a great place for a pop of colour… it can be anything from normal ‘ol brown to a vivid violet. It’s also very easy to skip, though, so if you can’t hold the brush steadily enough that day — it’s no biggie.

    Minute four:
    Curl lashes. Apply mascara if desired. This won’t take a whole minute, so if you’d like, now would be the to apply concealer as well!

    Minute five:
    Again with your fingers, apply a cream or gel multi-use product on the apples of the cheeks and the lips. I mixed a bunch of these for my sister with Vaseline and pigments (check out this tutorial) — we ordered a bunch of lip-and-cheek-safe Fyrinnae pigments and blushes, then filled up the sample jars with Vaseline, melted, and mixed. (I’ll post photos of them another day.)

    Tada! Five minutes and you’re done. It’s super-streamlined, uses brushes minimally, and can easily be taken on the go.

    Another suggestion for keeping it all together? Get an empty quad, and fill it with one all-over shadow, one shadow to line with, one cream blush/balm, and one cream blush/luminizer. It’s light, portable, and can be all that you use on a daily basis!


    Share:

    So 2000-and-late

    What is it: basically, an 88 palette. They come from Asia and they come in the thousands! I picked this one up at the Hair Show for about $18CDN. I know you can get them for something ridiculous like $12 if you really hunt them down, but let’s face it: pretty much no one ships to Canada, and those who do charge ridiculous fees.Ingredients below. Click to enlarge! Looks liek they used a standard label for all their products, so check out the first “paragraph”.Did I love it? To be quite frank, not at all. I was disappointed in the pigmentation and the shadows’ ability to blend — some of them wouldn’t swatch at all. Enlarge the picture below if you’re interested to see “the pathetics,” those that I wouldn’t even bother trying to use after the initial swatch attempt. (They’re the ones with the tiny black liquid liner dots).However, a few of the shades were alright. For someone who normally uses drugstore shadows, this would probably actually not seem all that bad — but I’m a pigment freak, and (I admit it) a bit of a shadow snob. Yes, I love my drugstore items, but they better be bloody packed with pigment.
    Swatches below of four random shadows pictured above (a shimmery brown and a matte brown; a shimmery blue and a matte blue). I’m not 100% sure, but I’m fairly certain what you’ll see is a wet swatch, a swatch over UDPP, a dry swatch, and finally, a swatch over a black cream base. Most of the shadows swatched like this, though very few were better and quite a number were worse.

    The verdict? Disappointment. I haven’t used this at all — I’m still not sure what I’ll do with it! Even after reading so many bad reviews for this, I still wanted to try it, and it failed to amaze me, unfortunately. I’m actually kind of wondering if they pulled a bait-and-switch, as the display palette seemed to swatch a lot better.

    If anyone’s still wanting to try it, name your price. I’d love to get this off my hands! The only thing between me and a giveaway right now are the ridiculous Canada Post rates.

    Share:

    Weekend Roundup — 19/09/09


    BeautyLuxe has compiled the ultimate Fall Beauty Guide.

    Check out exclusive peeks backstage during fashion week and the man of the week at Beauty Sweet Spot.

    Best Things in Beauty has a fabulous giveaway contest going; you could win a Giorgio Armani Beauty Crema Nera Regenerating Cream ($230).

    Claire’s Beauty is really loving the new L’Oreal Telescopic Explosion Mascara!

    DenimDebutante learns more about ECBC, a shopping site for women, by women (with a giveaway bonus!)

    Fab Finds Under $50 has selected 20 items for $465 creating over 40 outfits for the plus size gal!

    Fab Glance Nashville takes a look at the new owl-inspired jewelry trend.

    Fabulous Over Forty discovers the wonderful Spa Bath products of Lisa Hoffman Beauty.

    Gouldylox Reviews shares what to do when haircuts go wrong.

    Go backstage with Francois Nars and Marc Jacobs at the Marc Jacob’s Fashion Week Spring 2010 runway show at The Glamour Whore.

    The Informed Makeup Maven previews Victoria’s Secrets Holiday Collections.

    Krasey Beauty goes backstage with Mehron at Vassilios Kostetsos.

    Marina from Makeup4all tells you how to create bright coral lips that you could see at NYFW.

    Check out MAC Bible Secrets and My Views on Color Theory at The Makeup Snob.

    theNotice has finally found the perfect blue-red lip colour — honestly!

    Temple of Glam is serving up NY Fashion Week Coverage + “True Blood” Inspired Beauty.

    For more information about The HLMN or instructions on becoming an affiliate please visit our website.

    Share:

    Alison

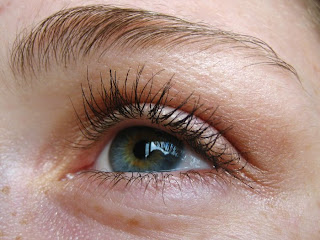
    Alison pretty much never wears more than a light layer of gloss, so this was kept super-super-subtle. (Rule #1 – don’t scare off the client!) Eyeshadow/mascara only. Ugh, the lack of a kit absolutely killed me!

    Before

    After
    Eye shots (how much do you totally love her lashes??! Envy.)

    Share:

    What’s going on here??

    I’m pretty sure that what I’m seeing is someone using a denture cleaner for lashes backstage at Iodice. Is this some newfangled backstage tip I haven’t heard yet??Intrigued.

    EDIT: wait, nevermind. Quote from the site:

    “Blair craftily employed a Dentek Easy Brush Cleaner sold in a pack of ten for $3.50 as a lash separating tool. Genius.”

    I was right! Isn’t that weird and kind of brilliant?

    Image via the Daily Makeover.
    Share:
    5 Comments

    Current sales

    See, this is why it’s a BAD IDEA to be home when you’re sick. Hautelook has Kevyn Aucoin right now!! KEVYN AUCOIN! At 60% off!!Rae. Calm down. You are on a low-buy. It’s alright. Just breathe…slowly back away from the compu–

    I SAID BACK AWAY!

    (Also, for those of you that are not with Hautelook yet, consider yourselves invited!)

    Share:

    Sulphur. Even though it smells bad.

    What it is: Mario Badescu‘s Drying Cream.

    Purpose: From the MB site…

    “Drying Cream is an effective treatment to dry up small under the surface bumps and pimples. Just a few dabs smoothed on the erupted areas prevent pimples from getting larger and spreading out of control. Aloe rich cream conceals and heals erupted pimples.”


    How I use it: After letting my moisturiser and/or primer sink in, I dab this onto any pimples (healing, coming to a head, or still in the “whitehead” stage!) with a fine-tipped concealer brush, the way I’d spot-apply any product. In the daytime, I then set it lightly with powder, and apply concealer overtop.

    Why I love it: The main reason? This stuff works. Smells awful, but it works! I find that my skin responds very well to sulphur and clay based products (this being the former) as it can be quite sensitive and dry… basically, they get rid of the zit *almost* as fast as a peroxide- or salicylic-based treatment, without causing peeling or irritation. Personally, I think trading a week of peeling in for another day with your zit is a pretty good deal.

    The added bonus
    : This formula goes on pretty opaque, which basically gives your concealer a “blank canvas” to work on, rather than a red dot. It colour-corrects, essentially! And, if you don’t want to apply concealer overtop, anyone with fair to medium skin could probably sheer this out and get away with using it alone. Envision UDPP or TFSI, but thicker. And smellier. But please (please!) keep it out of your eye area… if you blind yourself, it’s totally not my fault.The verdict? I think it’s probably pretty obvious by now, but I am formally recommending this to all of you! Seriously, I’m in love with this stuff. The only thing that could make it better is an affordable price — oh wait! It has that, too! (Sorry, I couldn’t help it. What can I say, I’m in a TV-commercial-joke mood right now!) It’s only $12 for 0.5oz, and you use just a tiny bit each time. LOVE.

    Share: