


I love playing with different textures when it comes to my makeup, but it’s not a regular thing for me — I have a set few products that I use all the time (mainly powders), and I don’t really get much of a chance to work with other methods of delivery.
My sister, though, is hugely into creme products. Like, hugely-hugely. She has this weird–and notably false–preconception that the pigments in cream products will stick around for longer, but it means that her stash is easily 80% cremes.
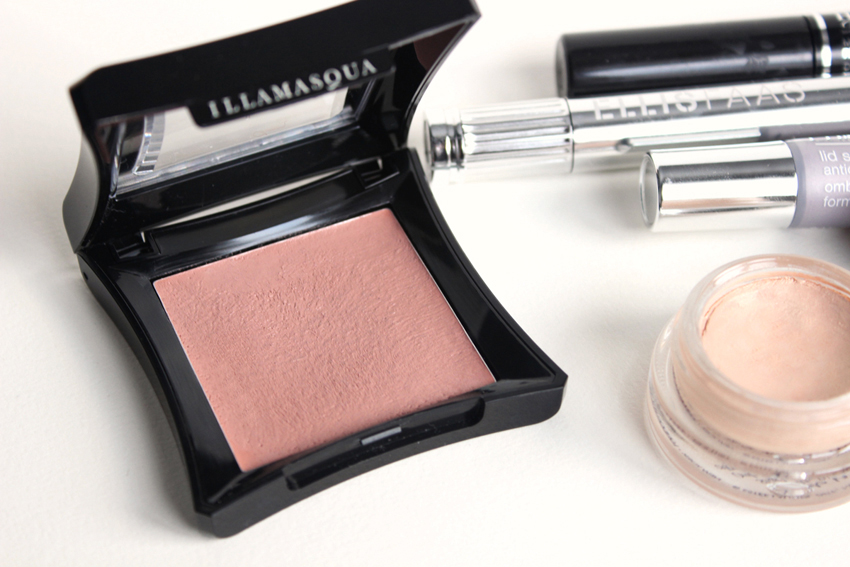
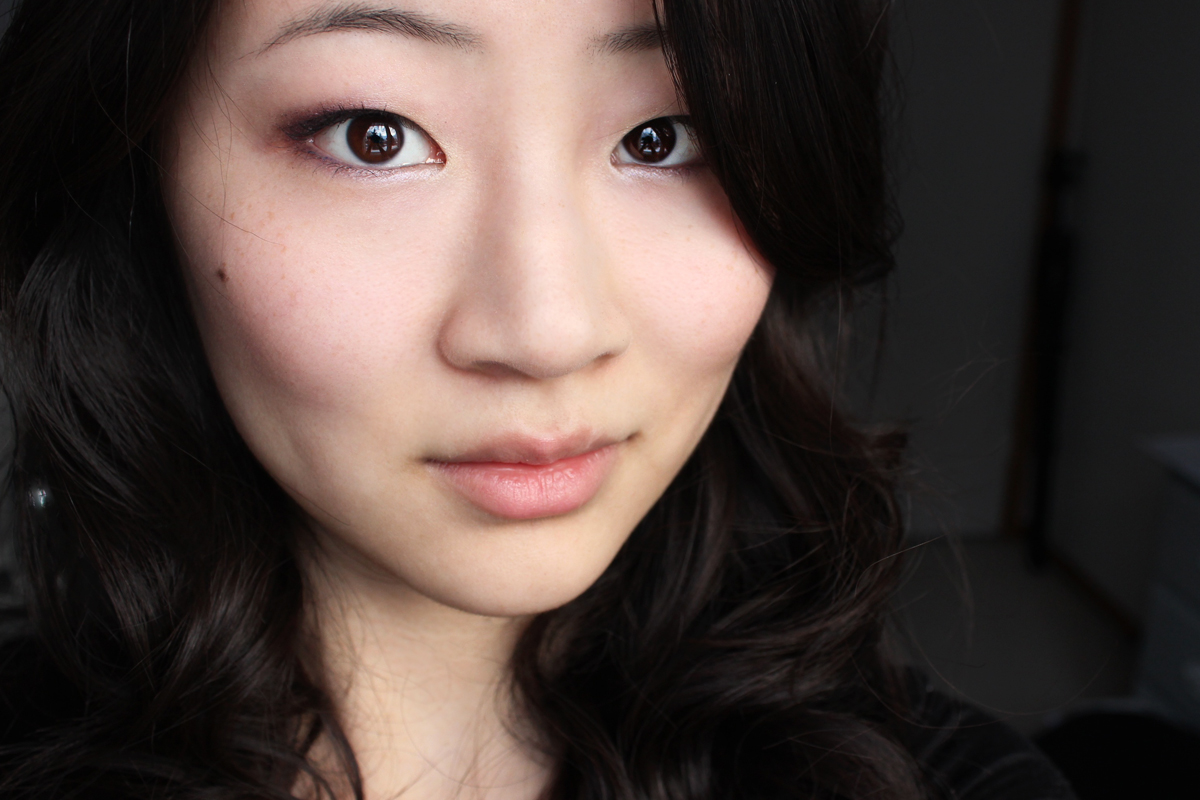
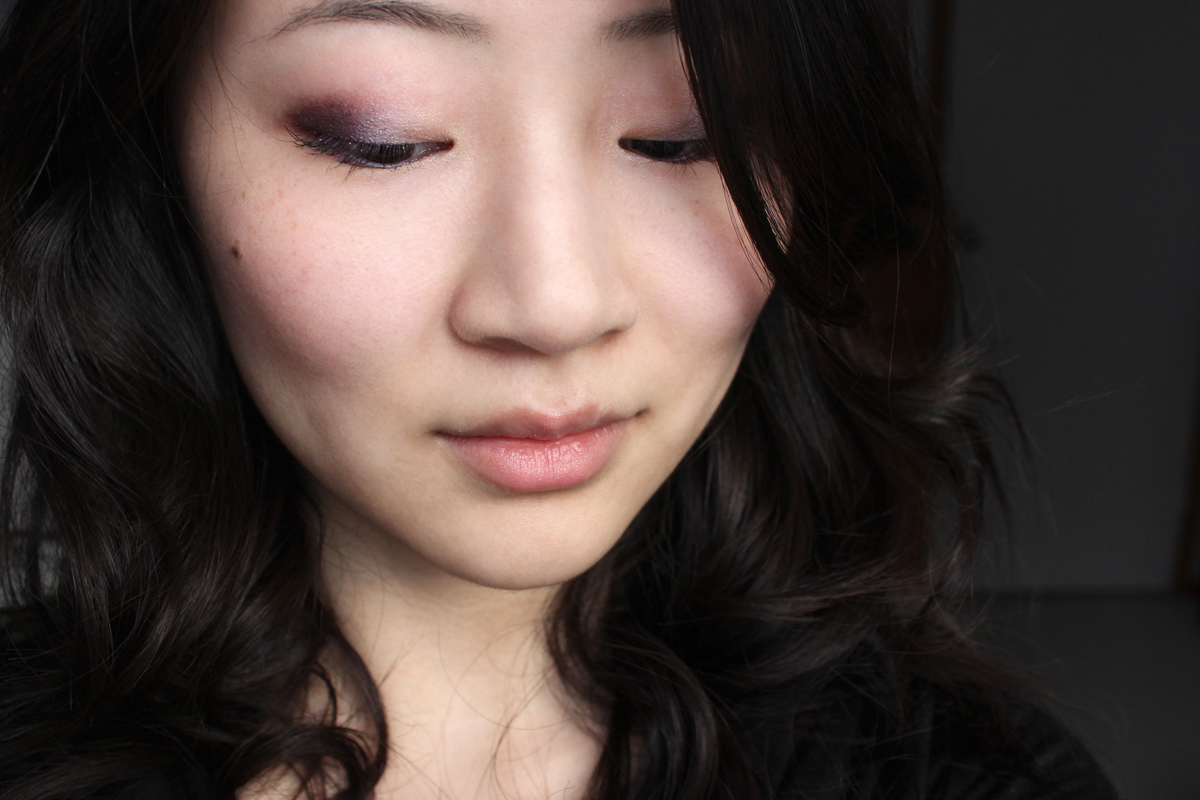
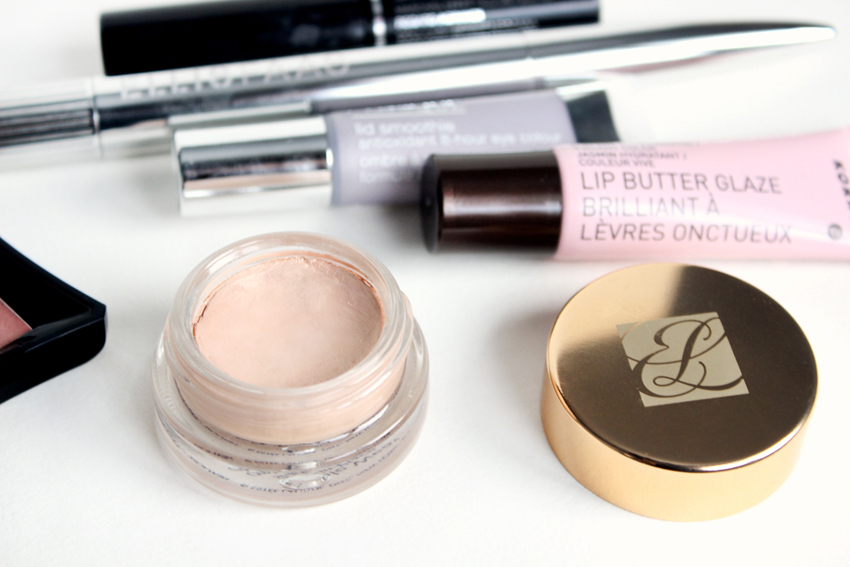
Anyhow. For something a little different, I borrowed a couple of her favourite creme products (the Estée Lauder cream eyeshadow and Illamasqua blusher) and threw together a violet-eyed, neutral-cheeked look.
For the full tutorial, don’t miss this post on She Said Beauty!
The eyes
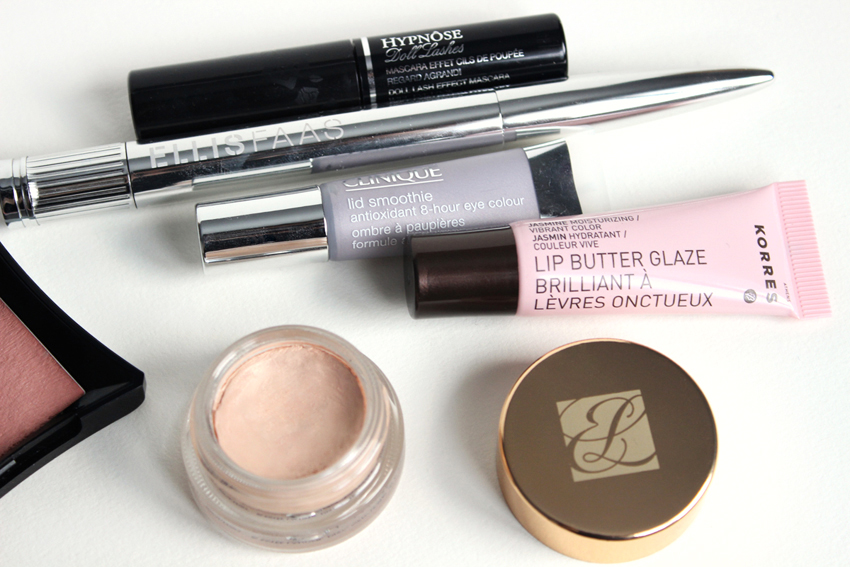
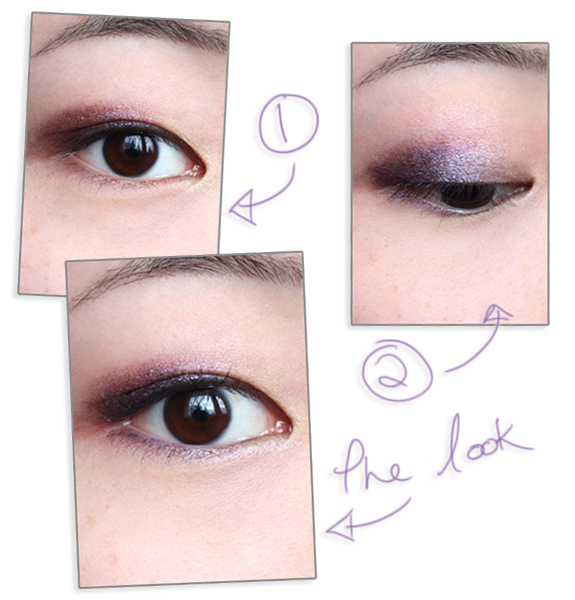
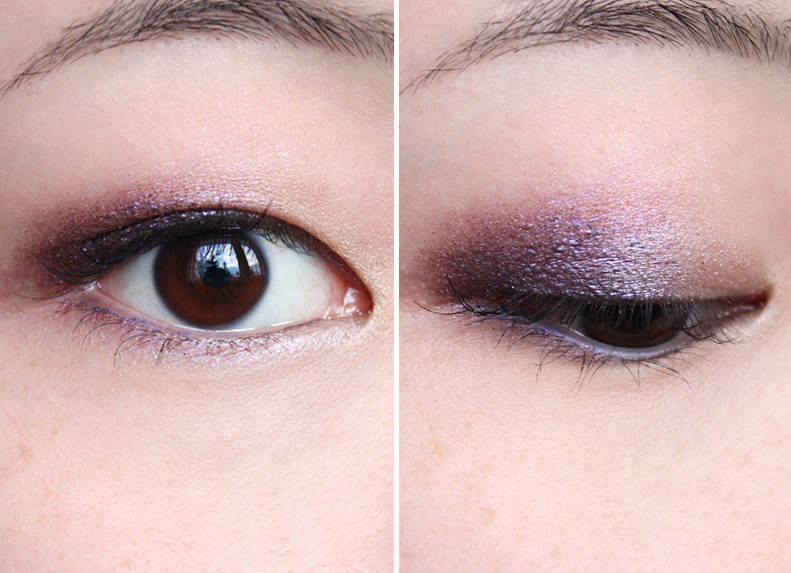
For the eye, I started with a base of Estée Lauder Ivory Lace (the ShadowCremes are being discontinued; try something like MAC Bare Study instead), added Ellis Faas Light in E304 to the outer half of the lid, then layered Clinique Lid Smoothie in Born Freesia overtop in the centre. And it… went actually horribly, to be honest.
I’ve never tried to layer one of the Lights before; I will never try to layer one of the Lights ever again.
(Actually, now that I think about it, I’m pretty sure I’ve come to this conclusion before. Anyone else find that Ellis products are glorious only if used without a primer underneath?)
I don’t know if it was the layering or the blending, but — never; never again. Fingers or brushes didn’t matter; drying time didn’t matter… again and again, I ended up with flaky bits of fallout and an increasing amount of eye irritation.
To get around this, I actually mixed the two violets on the back of my hand & applied. It went really well, surprisingly — E304 added an intensity that Born Freesia doesn’t usually have, but the texture of the Lid Smoothie was maintained and led to a really easy, smooth application.
Odds & ends
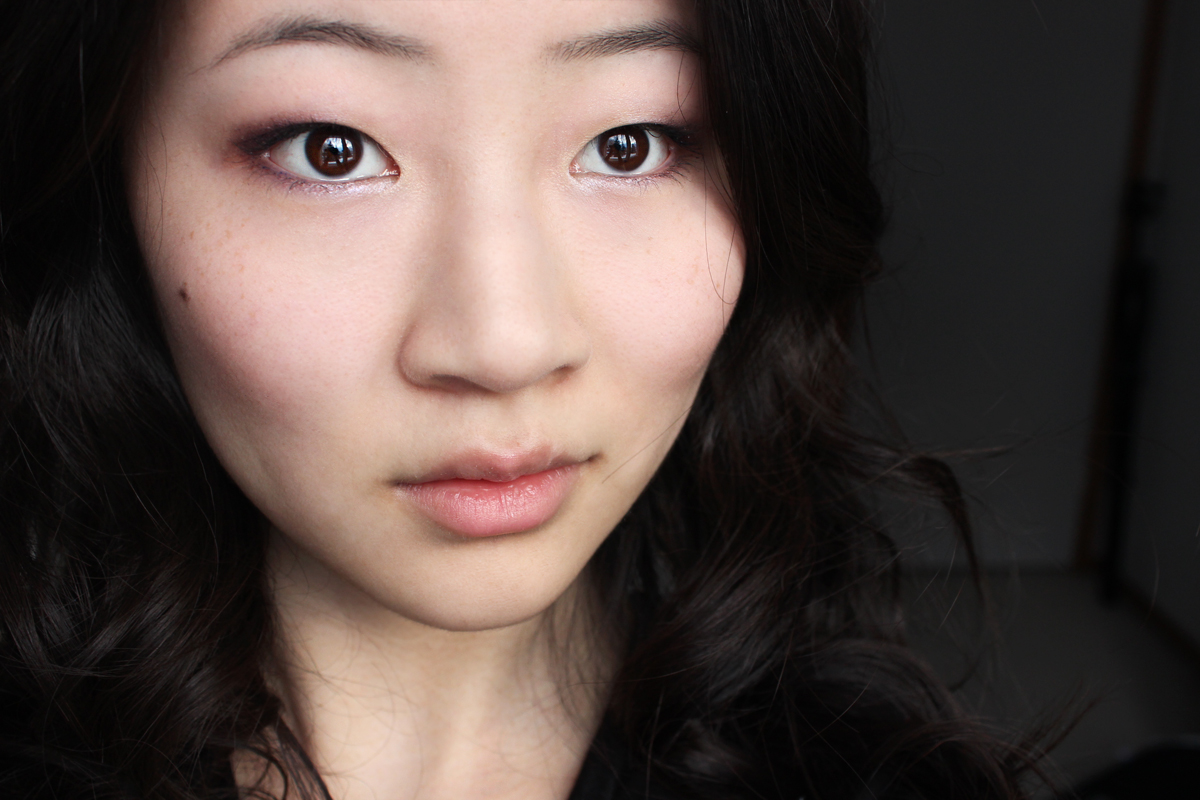
The rest of the look was pretty simple: a smooth base, a bit of contouring, a super-sheer light pink lip and a bit of colour through the brows. I’m wearing a coat of Lancôme Hypnôse Doll Lashes for mascara, and skipped powdering my skin because sometimes I get bored.
On the cheeks is a little bit of Illamasqua Cream Blusher in Zygomatic (just as pretty and easy to work with as everyone says it is) applied with a Real Techniques Expert Face Brush (just as soft and densely-packed as everyone says it is).
—
Shop this look

EYES
Estée Lauder Double Wear Stay-in-Place ShadowCreme in Ivory Lace, $18.50 (being phased out & replaced by the new Shadow Paint line, $24)
Ellis Faas Light in E304, $42
Lancôme Hypnôse Doll Lashes in So Black!, $27
Clinique Lid Smoothie in Born Freesia, $19.50 (probably my favourite Lid Smoothie! Swatches.)
Urban Decay 24/7 Glide-On Eye Pencil in Ransom, $19
LIPS
Korres Lip Butter Glaze in Jasmine, $14
CHEEKS
Illamasqua Cream Blusher in Zygomatic, $26